

© Original Recipe By Hollywood Recipes ©
Frozen Snowflake Sugar Cookies ❄️✨ The Perfect Winter-Themed Cookies for Snowy Days!
Kitchen tools and utensils used in this recipe
Enhance your baking experience with these top-quality tools:
- Build Elsa’s Magical Ice Palace (LEGO Frozen Set) — A fun and creative way to decorate your snowy cookie treats and imagine your own winter wonderland.
- Magical Winter 5-Piece Disney Frozen Twin Bed Set — Perfect for a cozy baking day or a winter-themed party.
- The Perfect Harry Potter Premium Gift Set (Mug, Figure & Postcards) — A magical touch to your kitchen essentials for hot beverages after cookie baking.
- Wear Your Story: Disney Princess “Living Locket” Set — Add a touch of Disney princess magic to your baking routine.
- Build the Addams Family Home: LEGO Morticia’s Cottage Set — A charming decoration or gift idea to complement your snowy cookie treats.
1. Introduction
Welcome to the enchanting world of Frozen Snowflake Sugar Cookies, a delightful winter-themed treat perfect for holiday parties, cozy family gatherings, or simply adding a touch of magic to your day. These iced sugar cookies are inspired by the shimmering beauty of snowflakes, capturing the spirit of winter with their intricate designs and sweet flavor. Easy to make and visually stunning, these snowy cookie treats will impress everyone who tastes them.
2. Ingredients
- 2 3/4 cups (340g) all-purpose flour
- 1 teaspoon baking powder
- 1/2 teaspoon salt
- 1 cup (226g) unsalted butter, softened
- 1 1/2 cups (180g) granulated sugar
- 1 large egg
- 1 teaspoon vanilla extract
- 1/2 teaspoon almond extract (optional)
- Royal icing or powdered sugar icing for decorating
- Edible glitter or shimmering sugar for a snowy effect
3. Step-by-step Instructions
Preparing the Cookie Dough
In a medium bowl, whisk together the flour, baking powder, and salt. In a large bowl, beat the softened butter and sugar together until creamy and fluffy. Add the egg, vanilla, and almond extract (if using) and mix until well combined. Gradually add the dry ingredients to the wet ingredients, mixing until the dough comes together. Divide the dough into two discs, wrap in plastic wrap, and refrigerate for at least 1 hour.
Rolling and Cutting
Remove the dough from the fridge and let it sit at room temperature for a few minutes. Roll out one disc on a lightly floured surface to about 1/4 inch thickness. Use a snowflake-shaped cookie cutter to cut out cookies. Place the cutouts onto a parchment-lined baking sheet, and repeat with the second disc.
Baking
Preheat your oven to 350°F (175°C). Bake the cookies for 8-10 minutes, or until the edges are lightly golden. Remove from the oven and let cool on a wire rack completely before decorating.
Decorating Your Snowy Cookies
Prepare royal icing or powdered sugar icing according to your preferred recipe. Using piping bags and tips, decorate the cookies with intricate snowflake patterns, adding glitter or shimmering sugar for a snowy, icy effect. Let the icing dry completely before handling or stacking.
4. Storage Tips for Frozen Snowflake Sugar Cookies
Once decorated and thoroughly dried, store your frozen snowflake sugar cookies in an airtight container at room temperature for up to one week. For longer storage, layer the cookies with parchment paper and keep them in a freezer-safe container for up to 3 months. To preserve their icy sparkle, avoid storing in humid environments.
5. Serving Suggestions
Display your winter-themed cookies on a festive platter or cake stand for holiday gatherings. Pair them with hot cocoa or spiced tea to enhance their cozy winter vibe. You can also use them as delightful Christmas or winter party favors to impress guests and loved ones alike.
6. Tips and Variations
- For a more authentic snowflake look, use a fine piping tip to create delicate icing details.
- Add a splash of food coloring to your icing to create colorful winter-themed designs.
- Replace almond extract with lemon or peppermint flavoring for a unique twist.
- For a gluten-free option, substitute all-purpose flour with a gluten-free blend.
7. Frequently Asked Questions (FAQs)
Can I make these cookies gluten-free?
Absolutely! Use a gluten-free flour blend as a substitute for all-purpose flour. Be sure to check that your icing ingredients are also gluten-free.
How long do the cookies last?
Undecorated, properly stored snowflake sugar cookies can last up to a week at room temperature. Decorated and dried, they can be kept for up to 3 months if stored in an airtight container in the freezer.
Can I freeze the dough?
Yes, wrapping the dough discs tightly in plastic wrap, you can freeze them for up to 3 months. Thaw in the refrigerator overnight before rolling out and baking.
How do I prevent the icing from cracking?
Ensure the cookies are completely cooled before decorating, and allow the icing to dry thoroughly in a cool, dry place. Thin layers of icing tend to crack less.
8. Similar recipes to try
- Taylor Swift Enchanted Tea Biscuits – For a whimsical cookie experience.
- Pocahontas Savory Harvest Stew – Perfect for pairing with your sweet treats.
- Billie Eilish Christmas Glow Jelly – A festive dessert to complement your winter baking.
- Hulu Original Series Cupcakes – Another delightful sweet option for the holidays.
- Snow White Jewel Mine Cookies – A sparkling, jewel-inspired cookie idea for winter festivities.
9. Conclusion
Creating Frozen Snowflake Sugar Cookies is a delightful way to celebrate the magic of winter. Their intricate designs and snowy appearance make them a beautiful addition to any holiday table or winter gathering. Whether you’re baking with family or preparing a festive platter, these cookies are sure to bring joy and sparkle to everyone. Embrace the season’s beauty and enjoy making these icy, adorable treats that capture the essence of a snowy wonderland.
Print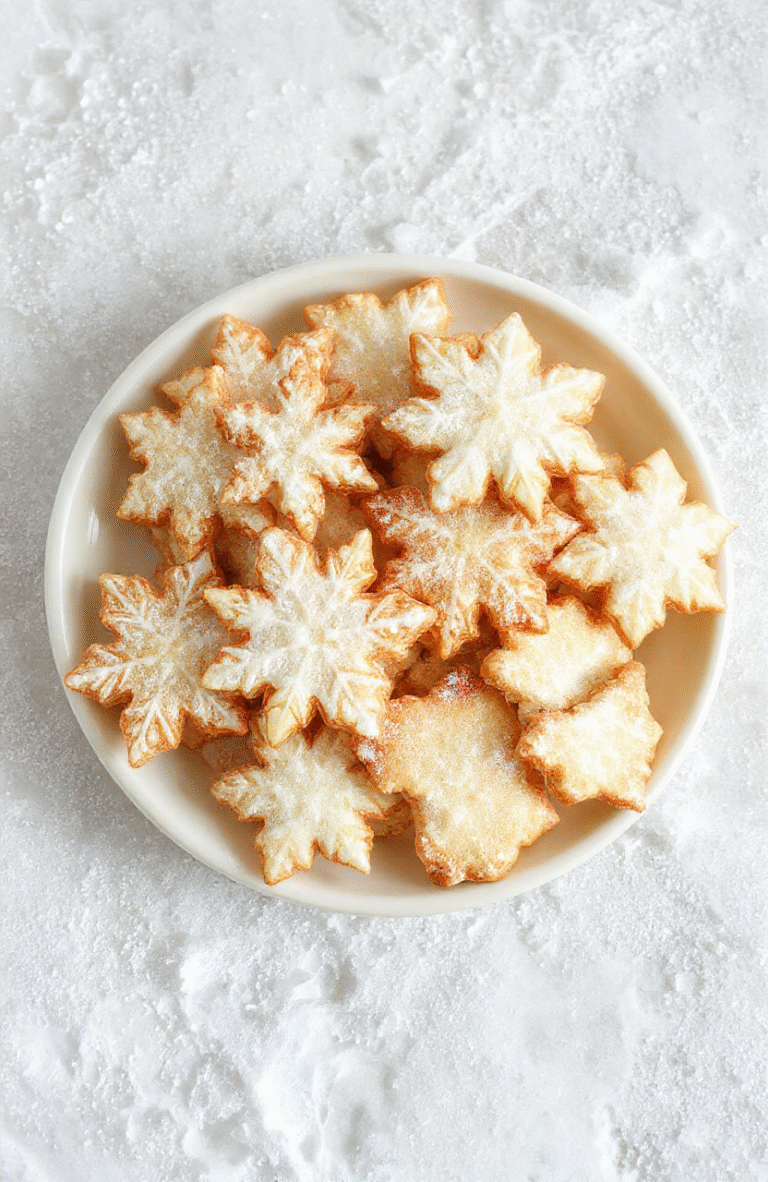
Frozen Snowflake Sugar Cookies
Chewy and sweet sugar cookies decorated with icy blue and white icing, inspired by winter snowflakes and magical film scenes.
- Total Time: 1 hour 10 minutes
- Yield: 24 cookies
Ingredients
- 2 3/4 cups all-purpose flour
- 1 teaspoon baking powder
- 1/2 teaspoon salt
- 1 cup unsalted butter, softened
- 1 1/2 cups granulated sugar
- 1 large egg
- 1 teaspoon vanilla extract
- Royal icing (powdered sugar, meringue powder, water)
- Food coloring (blue, white)
Instructions
- In a bowl, combine flour, baking powder, and salt.
- Cream together butter and sugar until light and fluffy.
- Add egg and vanilla, mixing well.
- Gradually add dry ingredients, mixing until dough forms.
- Chill dough for at least 1 hour.
- Preheat oven to 350°F (175°C). Roll out dough and cut into snowflake shapes.
- Bake for 8-10 minutes or until edges are lightly golden.
- Mix royal icing with food coloring to create icy blue and white hues.
- Decorate cooled cookies with icing to form snowflake patterns. Let set before serving.
Notes
- Chill dough to prevent spreading during baking.
- Use piping bags for detailed snowflake designs.
- Decorate with edible glitter for added frost effect.
- Prep Time: 30 minutes
- Cook Time: 10 minutes
- Method: Baking, decorating
- Cuisine: Holiday, fantasy
- Diet: Vegetarian
Nutrition
- Serving Size: 1 cookie
- Calories: 150 kcal Kcal
- Sugar: 10 g
- Sodium: 70 mg
- Fat: 8 g
- Saturated Fat: 5 g
- Unsaturated Fat: 2 g
- Trans Fat: 0 g
- Carbohydrates: 18 g
- Fiber: 0.5 g
- Protein: 2 g
- Cholesterol: 10 mg
