
Game of Thrones Direwolf Bread Loaves: Bake Your Way to Westeros with These Majestic Creations 🐺🍞🔥
1. Introduction
Step into the world of Westeros with these stunning Game of Thrones Direwolf bread loaves! Perfect for themed parties, Game of Thrones watch nights, or simply indulging your inner Stark, these bread loaves are as delicious as they are impressive. The detailed shaping transforms ordinary bread dough into edible works of art that will have everyone saying “Winter is Coming” with delight.
If you’re a fan of creative baking projects, you’ll love how these bread loaves bring the iconic Direwolves from George R.R. Martin’s epic saga to life. Inspired by the beloved Stark family companions like Ghost and Nymeria, each loaf becomes a centerpiece worthy of the Great Hall at Winterfell. Whether you’re hosting a viewing party for House of the Dragon or just want to surprise fellow fans, this recipe delivers both in flavor and dramatic presentation.
2. Ingredients
Before you begin your baking journey to the North, gather these essential ingredients. For the best results, we recommend using high-quality flour and fresh yeast. If you’re looking for more baking inspiration, check out Rosanna Pansino’s take on Direwolf bread for additional creative ideas.
- 4 cups all-purpose flour (plus extra for dusting)
- 1 1/2 cups warm water (about 110°F)
- 2 1/4 tsp active dry yeast (1 standard packet)
- 1 tbsp granulated sugar (helps activate the yeast)
- 1 1/2 tsp fine sea salt
- 2 tbsp olive oil (extra virgin works best)
- 1 large egg (for egg wash – creates that golden crust)
- Black sesame seeds or poppy seeds (for authentic Direwolf facial details)
3. Step-by-Step Instructions
Step 1: Prepare the Dough
Begin by activating your yeast – this crucial step ensures your bread will rise properly. In a large mixing bowl, combine the warm water (not too hot or it will kill the yeast), sugar, and yeast. Let this mixture sit for 5-10 minutes until it becomes frothy and develops a slightly sweet aroma. This indicates your yeast is alive and ready to work its magic.
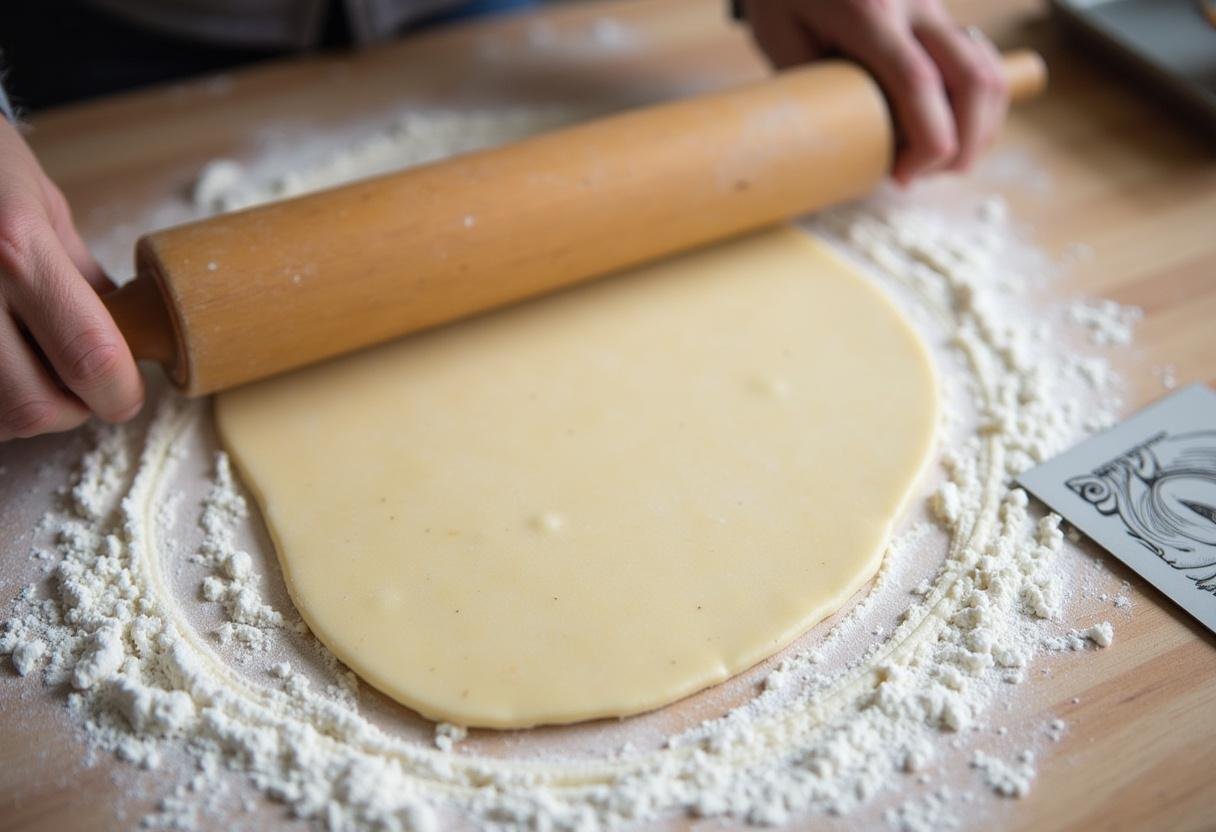
Once your yeast is activated, add the flour, salt, and olive oil. Mix with a wooden spoon until a shaggy dough forms, then turn it out onto a lightly floured surface. Knead for 8-10 minutes, using the heel of your hand to push the dough away from you, then folding it back. You’ll know it’s ready when the dough becomes smooth, elastic, and springs back when gently pressed.

Step 2: Shape the Direwolf Heads
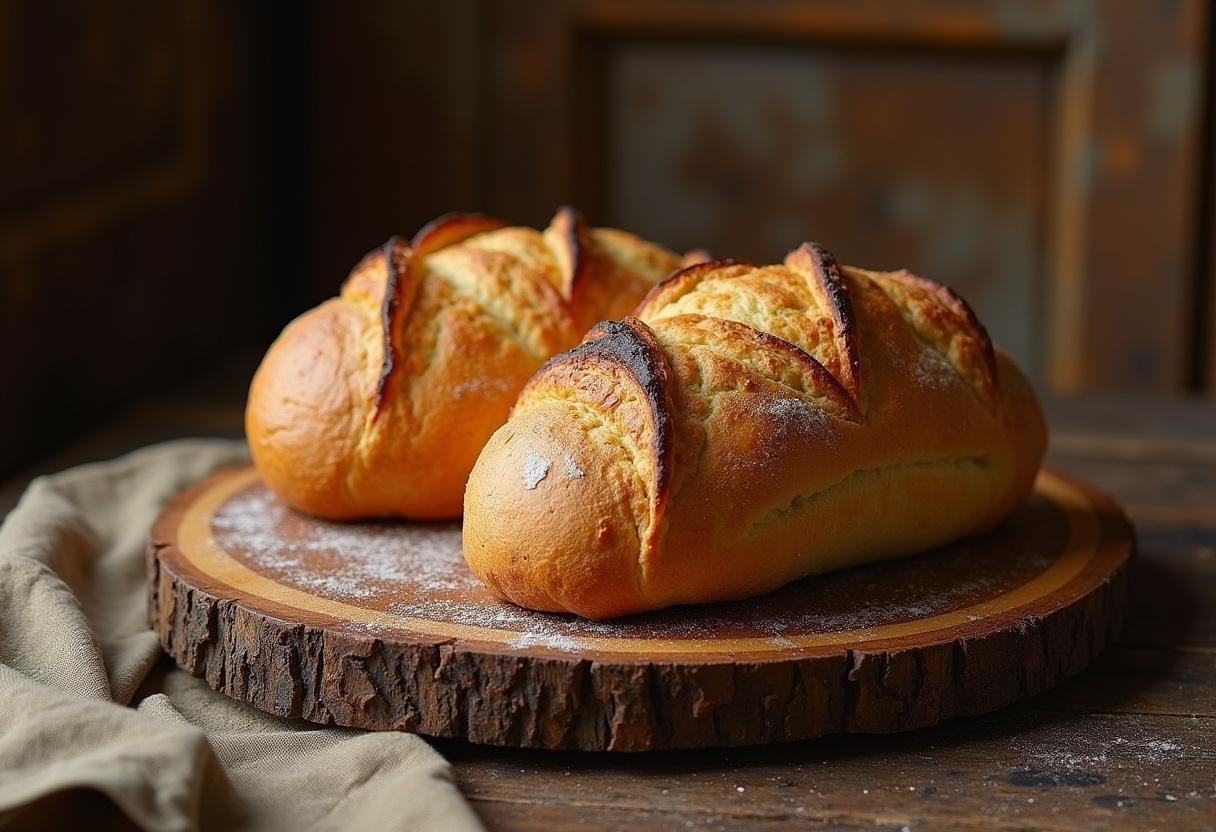
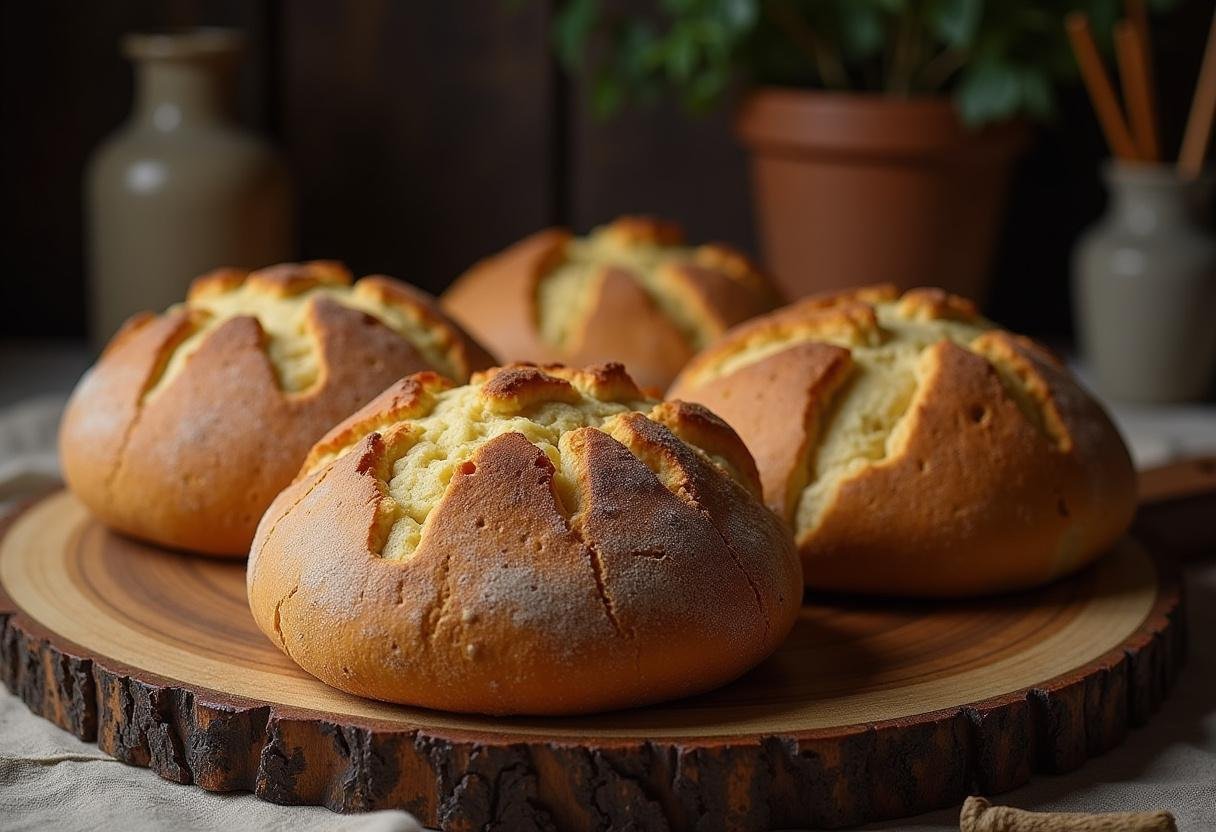
Now for the fun part – bringing your Direwolves to life! Divide the dough into 4 equal portions (about 8 oz each) for standard-sized loaves. If you prefer smaller, individual portions, you can make 6-8 smaller loaves instead.
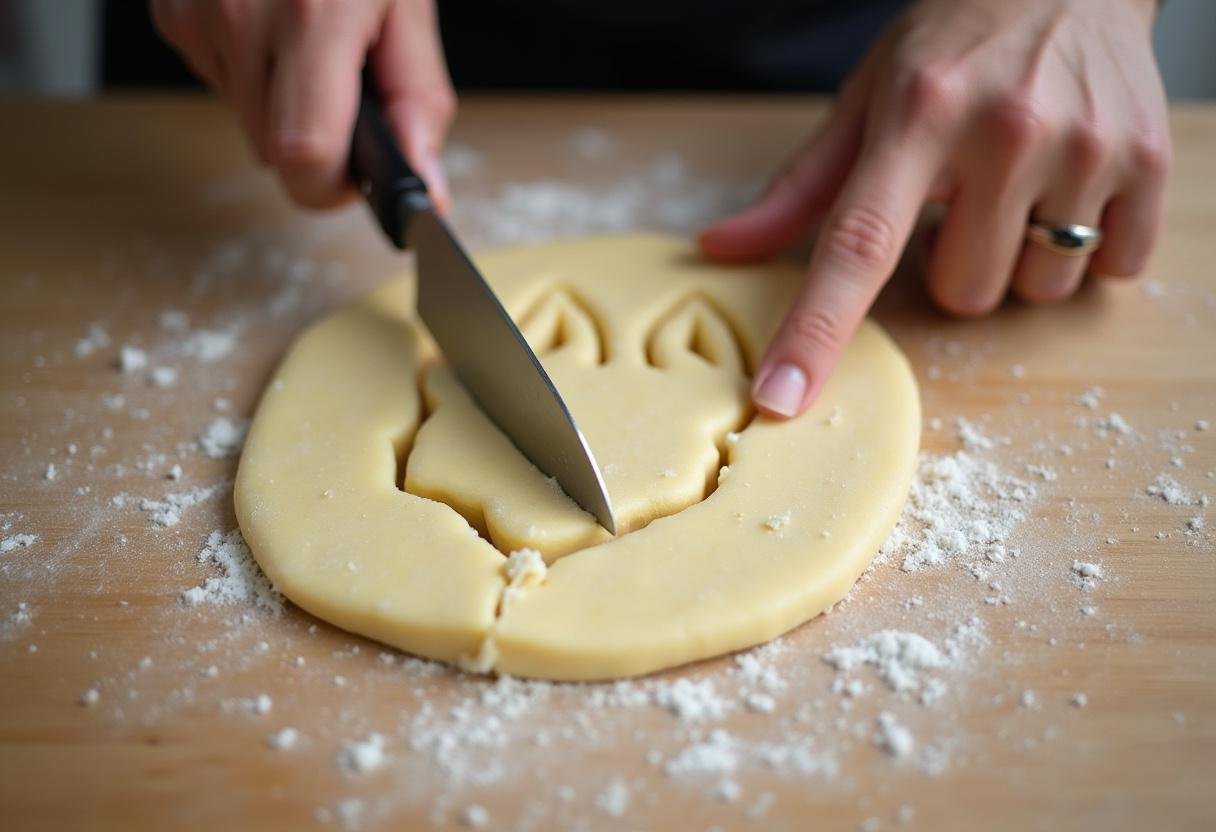
Roll each portion into an oval shape about 1-inch thick – this forms the basic head shape. Pinch one end to create the distinctive Direwolf snout. For that wild, furry appearance characteristic of the Stark direwolves, use clean kitchen scissors to make small cuts all along the edges. Angle your cuts slightly outward to create a more natural fur texture.
Step 3: Add Facial Details
Take small pieces of reserved dough (about the size of a grape) to create pointed ears. Attach them to the top of the head using a dab of water as “glue.” For more defined features, use the back of a knife to make shallow indentations for eyes and mouth.
The magic really happens when you add the sesame seed details. Place two black sesame seeds for each eye, pressing them gently into the dough. Add a cluster of 3-4 seeds for the nose to give your Direwolf that distinctive snout. For an extra touch, you can use a toothpick to etch subtle fur lines around the face.
Step 4: Bake to Golden Perfection
Place your shaped loaves on a parchment-lined baking sheet and let them rise in a warm, draft-free area for about 30 minutes. They should puff up slightly but maintain their shape. Meanwhile, preheat your oven to 375°F (190°C) – this ensures even baking.
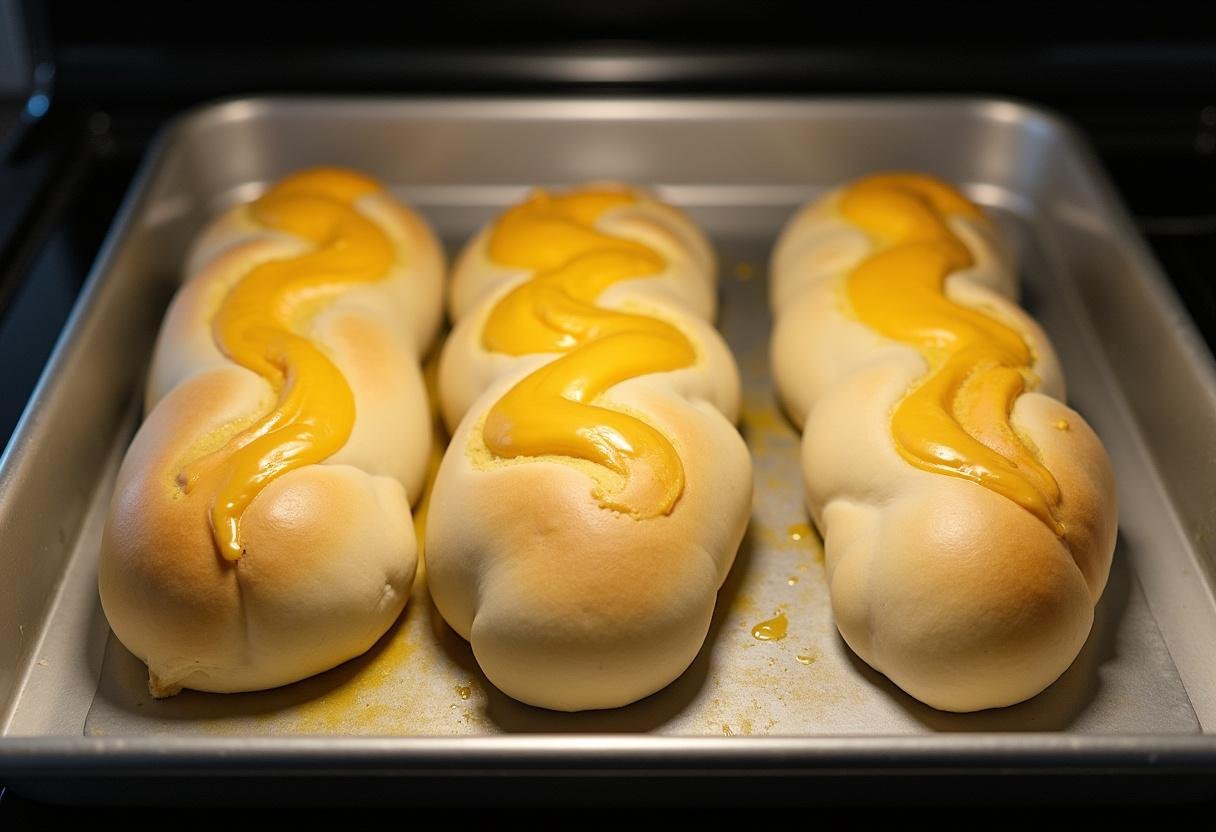
Before baking, gently brush each loaf with beaten egg wash (1 egg beaten with 1 tbsp water). This gives your Direwolves that beautiful golden-brown crust. Bake for 20-25 minutes until deeply golden and hollow-sounding when tapped on the bottom. Let cool on a wire rack for at least 15 minutes before serving – the aroma will have your guests gathered around like the Stark children at supper.
4. Tips for Success
- Flavor Boost: Add 1 tsp of garlic powder or dried rosemary to the dough for extra depth
- Dough Consistency: If too sticky, add flour 1 tbsp at a time until manageable
- Perfect Rise: Let dough rise in a warm (not hot), draft-free area covered with a damp towel
- Sharp Tools: Use very sharp scissors or a razor blade for clean cuts when shaping
- Even Baking: Rotate baking sheet halfway through for uniform browning
- Alternative Yeast: Instant yeast works too – mix directly with dry ingredients
5. Serving Suggestions
These Game of Thrones Direwolf bread loaves deserve an equally impressive presentation. Here are some serving ideas worthy of a feast at Winterfell:
- Honey Butter: Whip softened butter with honey and a pinch of salt for a sweet contrast
- Beef and Barley Stew: Perfect for dipping, just like the Starks would enjoy
- Spinach and Artichoke Dip: A nod to House Tyrell’s sophisticated tastes
- Cheese Board: Pair with sharp cheddar and aged gouda for a noble spread
- Mulled Wine: Complete your Westeros experience with this warm spiced drink
For more themed recipe ideas, explore our collection of Hollywood-inspired dishes that bring your favorite movies and shows to life.
6. Storage Instructions
To keep your Direwolf bread fresh:
- Room Temperature: Store in an airtight container or bread box for up to 3 days
- Freezing: Wrap tightly in plastic then foil, freeze for up to 1 month
- Refreshing: Reheat in a 300°F oven for 5-10 minutes to restore crispness
- Pre-slice: Consider slicing before freezing for easy single servings
7. Variations
Customize your Direwolf bread to match different houses or dietary needs:
- Whole Wheat Version: Substitute half the flour with whole wheat for nuttier flavor
- Cheesy Direwolves: Add 1/2 cup shredded sharp cheddar to the dough
- Mini Direwolves: Make bite-sized versions perfect for parties
- Dragon Bread: Modify shaping for Targaryen-themed loaves with scale textures
- Gluten-Free: Use a 1:1 gluten-free flour blend (may need extra liquid)
- Sweet Version: Add 2 tbsp honey to dough and serve with jam
8. Frequently Asked Questions
Can I make this dough ahead?
Yes! You have two options: 1) Prepare the dough, shape it, then refrigerate overnight (let come to room temp before baking), or 2) Freeze shaped loaves before final rise, then thaw and rise before baking.
What if I don’t have sesame seeds?
Get creative! Use small bits of black olive, food-safe markers after baking, or even whole peppercorns for eyes. For a simpler approach, just etch the features deeper before baking.
Can kids help with this recipe?
Absolutely! Children love shaping the dough – assign them tasks like cutting the “fur” or placing sesame seed eyes. It’s a great way to introduce young bakers to bread-making.
How do I prevent the ears from burning?
If the ears start browning too quickly, tent them with small pieces of foil. You can also brush them with a little extra egg wash to protect against over-browning.
9. Conclusion
These Game of Thrones Direwolf bread loaves are more than just bread – they’re an edible tribute to the Stark family’s loyal companions and a guaranteed conversation starter at any gathering. The satisfaction of transforming simple ingredients into these majestic creations is almost as rewarding as claiming the Iron Throne (and much tastier).
Whether you’re hosting an epic viewing party, surprising a fellow fan, or just want to bring some Westeros magic to your everyday meals, this recipe delivers both in flavor and dramatic presentation. The house words say it all: “When you bake the Direwolf bread, the feast is coming!”
Share your creations online with #DirewolfBread and tag Hollywood Recipes – we love seeing your interpretations! May your ovens always be hot, your dough always rise, and your bread always be worthy of the North. Winter may be coming, but with these loaves, your table will always be warm and welcoming.

11 thoughts on “Game of Thrones Direwolf Bread Loaves”