
👾 Minecraft Dirt Block Chocolate Brownies 🍫✨
1. Introduction
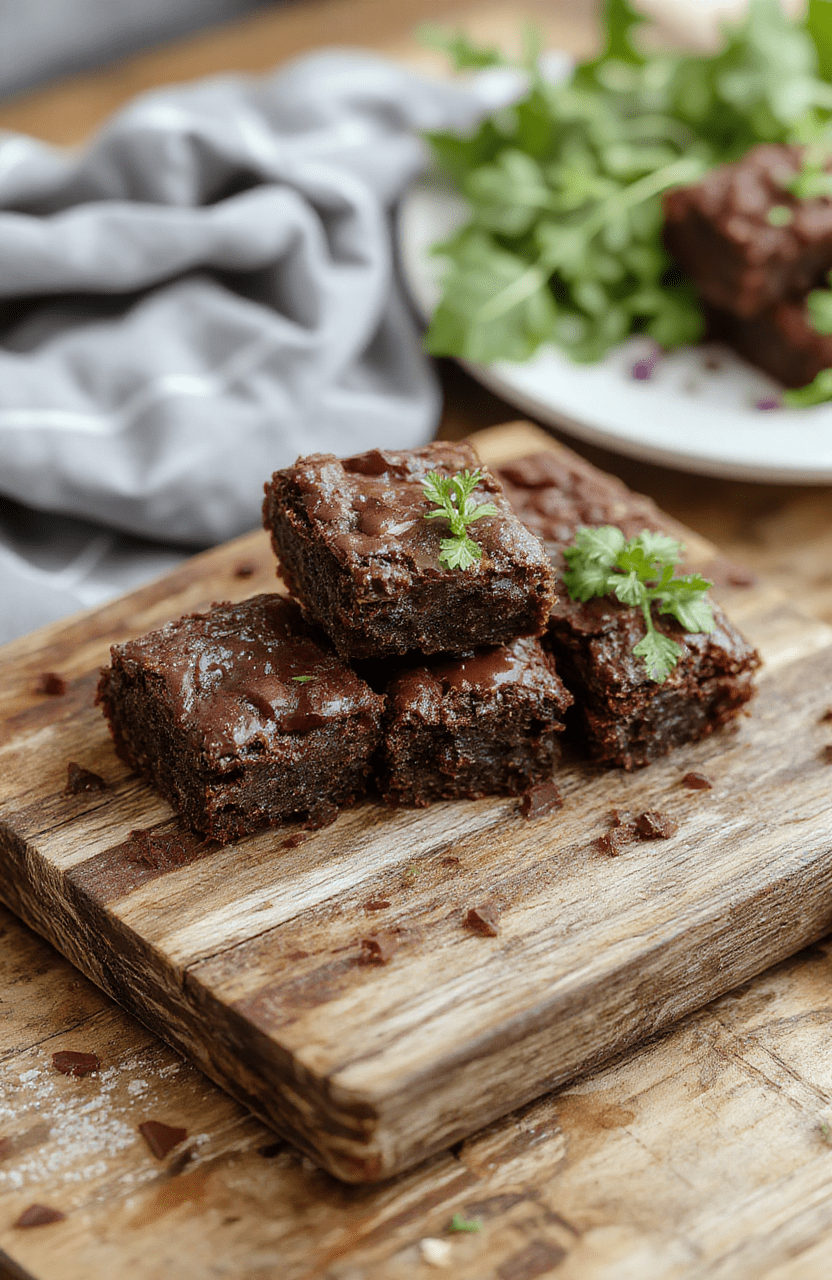
Craving something both nostalgic and *just* a little bit magical? These Minecraft dirt block chocolate brownies bring the iconic blocky charm of Minecraft straight to your kitchen—and your dessert stack. With a rich, fudgy chocolate center, a crunchy cookie crumb “dirt” top, and playful green frosting grass patches, these geeky chocolate treats are equal parts delicious and delightful.
Whether you’re hosting a birthday party for a 7-year-old (or just a 37-year-old who still loves Creepers), these dirt block brownies are guaranteed to spark smiles, snap Instagrams, and deliver serious dessert satisfaction. Think of them as a delicious tribute to pixelated adventures—no enchanted apples required.
2. Why You’ll Love This Recipe
- ✅ Ready in under 45 minutes—perfect for last-minute themed cravings
- ✅ One-bowl batter for minimal cleanup (yes, even for geeks)
- ✅ Highly customizable—use gluten-free flour, dairy-free chocolate, or nut-free “dirt” toppings
- ✅ No fancy equipment needed—just your standard baking pan and piping bag (or zip-top bag!)
- ✅ Make-ahead friendly—freeze unfrosted brownies or store frosted ones for up to 5 days
3. Kitchen Tools You Need
While this recipe is intentionally beginner-friendly, having the right tools can make your baking smooth, quick, and *fun*. Here’s what I recommend:
If you love air-frying *and* baking (yes, they can coexist!), the Compact 6-in-1 Digital Air Fryer by Amazon Basics is a stellar starter multi-cooker—great for reheating leftovers or warming up mini brownies without an oven preheat.
For clean, consistent mixing and folding, a trustworthy stand mixer like the KitchenAid Artisan 5-Quart Stand Mixer in Scorched Orange (vibrant orange!) makes whipping up the brownie batter effortless. Plus, its iconic design doubles as decor.
When it comes to precision and ease of clean-up, nothing beats nonstick bakeware. The T-fal 14-Piece Hard Anodized Nonstick Cookware Set includes baking sheets, mixing bowls, and muffin tins—all durable, uneven-heat-free, and dishwasher-safe.
For storing your finished dirt block brownies, the JoyJolt Airtight Glass Food Storage Set keeps them fresh, fudgy, and Crumb-free (just in case). And if you’re serious about documenting your culinary creations, the Clever Fox DIY Family Recipe Journal is perfect for writing down your “dirt block” tweaks for next time.
4. Ingredient Notes
Here’s where a few smart swaps can elevate these brownies from “good” to “block-level legendary.”
Dark chocolate (at least 70% cacao) is key for depth. I like using a mix—half semisweet, half bitter—to deepen the flavor without adding sugar. Melt it with butter for that glossy, fudgy base.
Cocoa powder (unsweetened, natural or Dutch-processed) adds richness and color. Dutch-processed gives a deeper “black forest” tone and smoother mouthfeel.
Cheerios or crushed chocolate-granola cereal make up the “dirt.” Crush them finely but leave some texture—no one wants concrete. For extra realism, toast them lightly in a dash of melted butter and a pinch of espresso powder (yes, it enhances chocolate without tasting like coffee!).
Green frosting “grass” should be vibrant but not fluorescent. I use a simple Swiss meringue buttercream (stable, not overly sweet) tinted with green food gel—never liquid, which thins the texture.
Brown sugar vs. white sugar: A 2:1 blend gives the ideal balance of chew and structure. Brown sugar adds moisture and a caramel whisper; too much white sugar can make them cakey.
5. How to Make Minecraft Dirt Block Chocolate Brownies
Phase 1: Prep & Melt
Preheat your oven to 350°F (175°C). Line a 9×13-inch baking pan with parchment—this is non-negotiable for clean unmolding. In a microwave-safe bowl, melt 1 cup (2 sticks) unsalted butter with 8 oz chopped dark chocolate in 30-second bursts, stirring until smooth. Let cool 5 minutes.
Phase 2: Mix the Batter
In a large bowl, whisk 1 cup granulated sugar, ½ cup brown sugar, 2 large eggs, and 1 tsp vanilla extract until pale and slightly thickened. Fold in the cooled chocolate-butter mixture. Sift in ⅔ cup all-purpose flour, ½ cup cocoa powder, and ¼ tsp salt. Gently fold just until combined—overmixing causes toughness.
Phase 3: Bake & Crumb the Top
Pour batter into the pan and smooth to the corners. Bake for 20–23 minutes. Test with a toothpick inserted near the center—it should come out with *moist* crumbs, not wet batter. Let cool completely in the pan on a rack. (Patience is part of the process!)
While cool, toast 1½ cups crushed chocolate cereal (like Chocolate Cheerios or Chocolate Mini Puffs) with 1 tbsp melted butter and a pinch of instant espresso powder for 5 minutes at 325°F. Let cool completely—it should smell like toasted chocolate and earth.
Phase 4: Frost & Design
Once entirely cool, spread a thick layer of green buttercream across the top (about ¼ inch). Sprinkle the warm-slightly-cooled “dirt” mixture evenly. For that authentic Minecraft “blocky” look, press a clean rectangular food scraper or offset spatula firmly into the frosting to create a grid of 4×3 blocks.
Optional: Pipe tiny “cobblestone” dots (using dark chocolate frosting) into some blocks, and add a few fake “slime” squares with lighter green frosting.
6. Expert Tips for Success
These hints come from dozens of test batches—and yes, a few muddy-counter disasters:
- Avoid soggy dirt: Ensure the brownies are *fully* cooled before frosting and crumbing. Warm brownies = melted butter = muddy mess.
- Espresso is magic: ½ tsp instant espresso powder intensifies chocolate flavor without bitterness. No one will catch the “hint of coffee”—but they’ll notice how much richer it tastes.
- Freeze for clean cuts: After frosting, chill the pan for 20 minutes before slicing. Makes perfect square blocks every time.
- Texture check: Your batter should be pourable but thick—like warm fudge sauce. If it’s runny, add 1–2 tbsp flour; if too stiff, add a teaspoon of milk or melted butter.
7. Variations & Substitutions
- Gluten-free dirt block brownies: Use a 1:1 GF flour blend + ½ tsp xanthan gum. Toast GF chocolate granola for dirt.
- Dairy-free version: Swap butter for vegan margarine, use dark chocolate chips certified dairy-free, and make a coconut-whipped “cream” frosting (tint green).
- Nut-free “dirt”: Instead of cereal, try crushed GF chocolate cookies (like Nutter Butters—check labels) or even crushed pretzels for a salty-sweet twist.
- Flavor boost: Swirl in 2 tbsp peanut butter before baking, or add a layer of crushed caramel candies for a “gold block” surprise.
- Edible glitter: Lightly dust with silver or gold edible pearl dust for an “enchanted” look.
8. Storage & Reheating
Room temp: Store in an airtight container for up to 3 days (grass may fade). Add the “dirt” just before serving for maximum crunch.
Fridge: Tight-wrap in plastic; keeps for 5 days. Bring to room temp 20–30 minutes before eating—the buttercream firms up but softens beautifully.
Freezer: Wrap individually in parchment + foil. Freeze for up to 3 months. Thaw overnight in the fridge, then let sit 15 minutes before serving.
For leftovers, reheat slices at 300°F for 4–5 minutes to restore fudginess. *Not* recommended for microwaved reheating—it can dry out the edges.
9. FAQ
Q: Can I make these without an oven?
A: Yes! Use a sheet pan and bake in a convection oven or air fryer: 325°F for 22–25 minutes with aoven-safe dish inside to prevent overheating.
Q: Why did my brownies turn out cakey?
A: Overmixing after adding flour, overbaking, or too much flour (scooped with a cup instead of spooned & leveled) all cause cakey texture. Measure carefully and stop mixing when *just* combined.
Q: Can I use real moss or lichen for the “grass”?
A: No—stick to edible greens only. Food-safe green powders (like matcha or spinach powder) can work in frosting, but not for texture.
Q: Are these suitable for kids with allergies?
A: With substitutions (gluten-free flour, dairy-free chocolate, nut-free dirt), yes. Always check all labels for cross-contamination if sensitivity is severe.
10. Conclusion
These Minecraft dirt block chocolate brownies aren’t just fun—they’re *delicious*, deeply chocolatey, and a breeze to make. Whether you’re celebrating a birthday, hosting a game night, or just craving a sweet escape, this recipe delivers all the joy (and crumbly satisfaction) of a well-loved block of chocolate, Minecraft-style.
Tag us on social if you try them—we’d love to see your creations! And for more pop-culture treats, check out our Harry Potter Butterbeer Cookies, Wednesday Addams Raven Black Velvet Cake, and Mad Men Deviled Eggs for retro flair.
Now go forth—bake boldly, crumble joyfully, and may your brownies be ever fudgy. 🌱🍫🪵 Print

Minecraft Dirt Block Chocolate Brownies
These fudgy Minecraft dirt block brownies are a fun, edible nod to the iconic block in the game. They’re dense, chocolatey, and perfect for themed parties or gifts.
- Total Time: 32 minutes
- Yield: 16 brownies
Ingredients
- 1/2 cup (113g) unsalted butter
- 2 oz (57g) high-quality dark chocolate (70% cacao)
- 3/4 cup (150g) granulated sugar
- 2 large eggs
- 1 tsp vanilla extract
- 1/2 cup (63g) all-purpose flour
- 1/4 cup (25g) unsweetened cocoa powder
- 1/4 tsp salt
- 1/4 cup (45g) chocolate chips (optional, for extra richness)
- 1 tbsp unsweetened cocoa powder (for dusting ‘dirt’)
Instructions
- Preheat oven to 350°F (175°C). Grease an 8×8-inch baking pan and line with parchment paper.
- Melt butter and dark chocolate together in a microwave-safe bowl or double boiler. Stir until smooth; cool slightly.
- Whisk in sugar, eggs, and vanilla until well combined and slightly glossy.
- Stir in melted chocolate mixture until fully incorporated.
- Sift in flour, cocoa powder, and salt. Fold gently until just combined — do not overmix.
- Fold in chocolate chips if using.
- Pour batter into pan and smooth top.
- Bake for 20–22 minutes until a toothpick inserted near center comes out with moist crumbs (not wet batter).
- Cool completely in pan, then lift out using parchment.
- Cut into 16 2-inch squares.
- Sift cocoa powder lightly over tops to create a realistic dirt-textured effect.
Notes
- For extra ‘earthy’ texture, press a few chocolate chips or broken bits into the top before dusting cocoa.
- Store in an airtight container at room temperature for up to 4 days or refrigerate for up to 1 week.
- These brownies freeze well for up to 1 month — thaw at room temperature.
- Prep Time: 10 minutes
- Cook Time: 22 minutes
- Method: Baking
- Cuisine: American
- Diet: Vegetarian
Nutrition
- Serving Size: 1 brownie
- Calories: 145 Kcal
- Sugar: 9g
- Sodium: 52mg
- Fat: 8g
- Saturated Fat: 5g
- Unsaturated Fat: 3g
- Trans Fat: 0g
- Carbohydrates: 17g
- Fiber: 2g
- Protein: 2g
- Cholesterol: 35mg
