

✨ Snow White Poison Apple Candy Apples: A Darkly Delightful Fairytale Treat!
1. Introduction
Step into a world of enchantment and suspense! These Snow White Poison Apple Candy Apples are the perfect Disney-inspired centerpiece for any fairy tale party, Halloween gathering, or kids’ birthday bash. With their glossy crimson-red coating, glistening sugar-dusted craters, and a mysterious white chocolate “poison” core, these apples look like they’ve been plucked straight from the Evil Queen’s enchanted orchard—yet they’re 100% kid-friendly and absolutely delicious!
Unlike traditional caramel apples, these modern candy apples feature a two-tone design: a crisp, shatter-sweet sugar shell gives way to a creamy white chocolate surprise inside. Every bite is a playful nod to the iconic scene from Disney’s *Snow White and the Seven Dwarfs*, minus the witchcraft—just pure, whimsical fun!
2. Why You’ll Love This Recipe
- Ready in under 30 minutes—faster than the dwarfs’ mining shift!
- No need for baking: just melt, dip, and chill.
- Uses simple, pantry-friendly ingredients with no special equipment required.
- Perfectly decorative, photogenic, and conversation-starting.
- Customizable for dietary needs (gluten-free, dairy-free, nut-free options included).
- Great for themed parties—pair these with a full Harry Potter spread or a Shrek-themed dessert bar!
3. Kitchen Tools You Need
While a few basic tools will do, investing in quality gear can elevate your candy-making experience—especially when scaling for parties!
For precise temperature control during candy coating, I rely on the Compact 6-in-1 Digital Air Fryer by Amazon Basics—it doubles as a gentle warming station for dipped apples and even revives soggy toppings in seconds. Not a fan of apps? Try the Ninja Foodi Smart XL Indoor Grill & Air Fryer Combo for multi-tasking prep space!
For a smooth candy melting process, use a heavy-bottomed saucepan—my go-to is the T-fal 14-Piece Hard Anodized Nonstick Cookware Set. Its even heat distribution prevents burnt sugar edges, which can ruin the candy apple’s mirror-like finish.
And if you love precision (like me!), a Breville Nespresso Vertuo Creatista Espresso & Coffee Maker makes an excellent “quick fix” side treat while the apples chill—because who says fairy tale treats can’t be luxury-inspired?
4. Ingredient Notes
A truly magical candy apple starts with smart ingredient choices. Here’s what makes each component shine:
Green Apples: I recommend Granny Smith apples—they’re firm, tart, and hold their shape beautifully after dipping. Larger apples (2.5–3 inches in diameter) give more surface area for dramatic cracking. Look for ones with smooth, unblemished skin for easier dipping.
White Chocolate: Use high-quality white chocolate discs (not chips—chips contain stabilizers that prevent smooth melting). I love Ghirardelli or Lindt for a creamy, rich “poison” center. For dairy-free, choose a coconut-based white chocolate like Swiss Miss Dairy-Free.
Red Candy Coating: Pick a red candy melts or candy coating (not just food coloring + sugar syrup). Brands like CakeDECOR or Wilton offer vibrant, stable red shades without cracking. Want extra sparkle? Toss in a splash of edible gold dust after dipping!
Edible Glitter & Sprinkles: Use food-grade edible glitter (not craft glitter 😅) for that magical “evil queen’s touch.” Try red and gold pearl dust for contrast or black jimmies to create tiny “worms” crawling out of the apple core!
5. How to Make Snow White Poison Apple Candy Apples
Wash apples thoroughly and pat completely dry—any moisture = ruined candy shell. Stem removal is critical: insert a small knife or melon baller through the stem end and carefully hollow out about a ½-inch deep cavity, revealing the core. Don’t remove the core entirely—just make a hollow well. Place apples upright on a parchment-lined baking sheet and chill for 10 minutes.
Melt white chocolate in a double boiler (or microwave in 20-second bursts, stirring each time) until smooth. Let cool slightly, then spoon into each apple’s hollow center—leave a tiny valley so the red coating won’t leak through. Return to fridge for 10 minutes to set.
Melt red candy coating following package instructions (usually 2–3 minutes in microwave). Work in batches: hold an apple by the stem, dip slowly to coat ⅔ to ¾ of the apple. Give a gentle twist to let excess drip off. For dramatic effect, dip one apple at a time—don’t flood your batch, or they’ll stick together!
While the red coating is still glossy, add finishing touches: drizzle a thin line of melted white chocolate down one side to mimic a “bite,” then sprinkle with edible glitter. After 2 minutes, add fine gold pearl dust to the apple’s “top” for that regal, cursed glamour. Chill for 15–20 minutes until set.
6. Expert Tips for Success
Condensation is your enemy! If your apples sweat before dipping, the candy coating will seize and turn grainy. Always chill apples *after* hollowing, and let them sit at room temp for just 2 minutes before dipping—never skip this.
Temperature matters. White chocolate melts at 82–84°F (28–29°C), while red candy coating should be 90–95°F (32–35°C). Too hot? The chocolate will seize and crack. Too cool? It’ll be lumpy. Use a candy thermometer (my KitchenAid Artisan Stand Mixer is great for storing it beside the bowl!) for foolproof results.
Work in batches. Prep the fillings, then dip 3–4 apples at a time. Set each finished apple on a wire rack over parchment to air-dry—this prevents sogginess on the bottom.
Test your setting point. Drop a tiny bit of candy coating onto a cold spoon—if it hardens in 3–4 minutes at room temp, you’re good to go! If not, cool slightly and test again.
7. Variations & Substitutions
Want to tailor these to your guests’ preferences? Here are flexible ideas:
Dairy-Free: Swap regular white chocolate for coconut milk-based white chocolate and use dairy-free candy coating (available at most health stores).
Nut-Free & Gluten-Free: Check all labels—most高质量 candy coatings and apples are naturally free, but always verify for cross-contamination.
Color-Themed: Try “Jafar’s Emerald Mist” (green candy coating + bronze glitter) or “Ursula’s Deep Sea Mystery” (purple + iridescent glitter). For *Lord of the Rings* nights, check out our Gollum sushi bowls for a savory duo!
Adult Twist: Swirl a drop of amaretto or Bailey’s into the white chocolate center—just a few drops for richness. Call it the “Queen’s Secret Elixir”!
8. Storage & Reheating
Candy apples should be stored in an airtight container in the refrigerator for up to 5 days. Place parchment between layers to prevent sticking.
Never freeze—moisture builds up in the sugar shell and causes cracking. If apples “sweat” in transit, pat dry with a paper towel before serving.
To serve, let apples sit at room temperature for 10–15 minutes. This softens the candy slightly, making it less brittle and more enjoyable to bite.
9. FAQ
Q: Can I use caramel instead of candy coating?
Yes—but it won’t “crack” like the classic poisonapple. Caramel needs refrigeration and will melt faster. Best for same-day events.
Q: Why did my candy coating crack?
Most likely, it was overheated or moisture got in. Always use dry tools, and never add water to candymelts. Also, dipping cold apples into hot coating causes stress cracks.
Q: Are these safe for young kids?
Absolutely! Just watch for choking hazards: cut apples into halves or quarters if serving to children under 5. And remind guests to use gentle pressure—the shell is candy-hard!
Q: How far ahead can I make them?
I recommend making them 24 hours in advance max. Past that, the apple flesh near the core may soften slightly.
10. Conclusion
These Snow White Poison Apple Candy Apples are more than dessert—they’re storytelling in edible form. The perfect blend of nostalgia, whimsy, and flavor, they’re sure to impress guests and spark laughter around your table. For more delicious Disney magic, check out the Upside Down Waffle Sundae or Weasley’s Butterbeer Cookies!
Once you master the core “poison” technique, try layering different colors (black for Maleficent’s dragon egg anyone?)—the only limit is your imagination. Happy cooking, and may your kitchen stay curse-free!
Print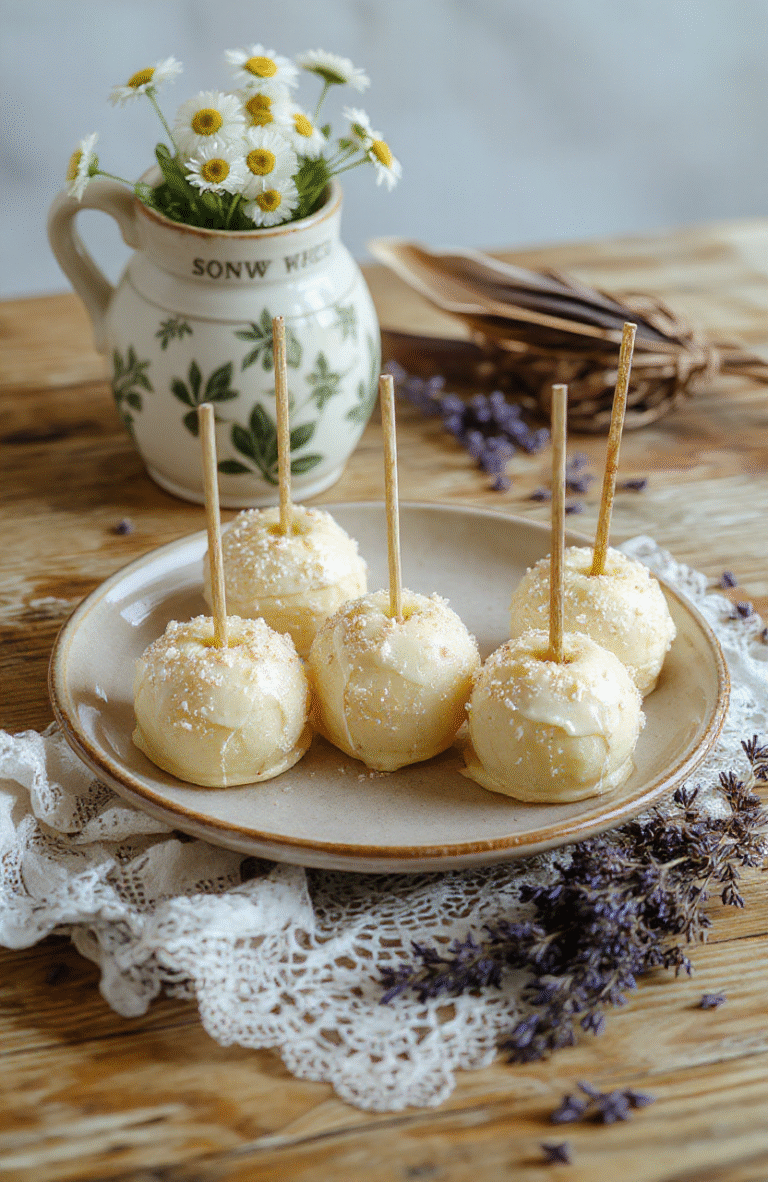
Snow White Poison Apple Candy Apples
Candy-coated apples inspired by Snow White’s poisoned apple, featuring a shiny red candy shell, optional gold leaf, and crisp apple centers.
- Total Time: 35 minutes
- Yield: 4 apples
Ingredients
- 4 large Gala or Granny Smith apples, stemmed
- 2 cups granulated sugar
- 3/4 cup light corn syrup
- 1 cup water
- 1/4 tsp cream of tartar
- 1/2 tsp red food coloring (liquid or gel)
- Pinch of edible gold leaf (optional)
- Green craft wire or fresh apple leaves for stems (optional)
Instructions
- Prepare apples: Wash, dry thoroughly, and insert wooden sticks through stems. Chill for 30 minutes.
- In a heavy saucepan, combine sugar, corn syrup, water, and cream of tartar. Bring to a boil over medium heat, stirring until sugar dissolves.
- Attach candy thermometer. Boil without stirring until reaching 300–310°F (hard crack stage).
- Remove from heat; stir in food coloring until uniform red.
- Dip chilled apples quickly, rotating to coat evenly. Allow excess to drip off.
- Immediately press a tiny piece of edible gold leaf onto the glossy surface while still tacky (if using).
- Set upright in泡沫 block or carton to harden (10–15 mins).
- Optional: Wrap wire around stem for decorative greenery or attach mini apple leaves.
Notes
- Work fast once candy reaches temperature—it sets quickly!
- Use a candy thermometer for accuracy; temperature is critical for hardness.
- For a less sweet version, reduce sugar to 1.5 cups and increase corn syrup to 1 cup—but expect slightly softer results.
- Prep Time: 20 minutes
- Cook Time: 15 minutes
- Method: Boiling
- Cuisine: American
- Diet: Vegetarian
Nutrition
- Serving Size: 1 apple (150g)
- Calories: 220 Kcal
- Sugar: 56g
- Sodium: 10mg
- Fat: 0g
- Saturated Fat: 0g
- Unsaturated Fat: 0g
- Trans Fat: 0g
- Carbohydrates: 57g
- Fiber: 2g
- Protein: 0g
- Cholesterol: 0mg
