

✨ Wicked Elphaba Emerald Mint Jellies: Glittering, Minty Magic for Your Next Themed Party ✨
1. Introduction
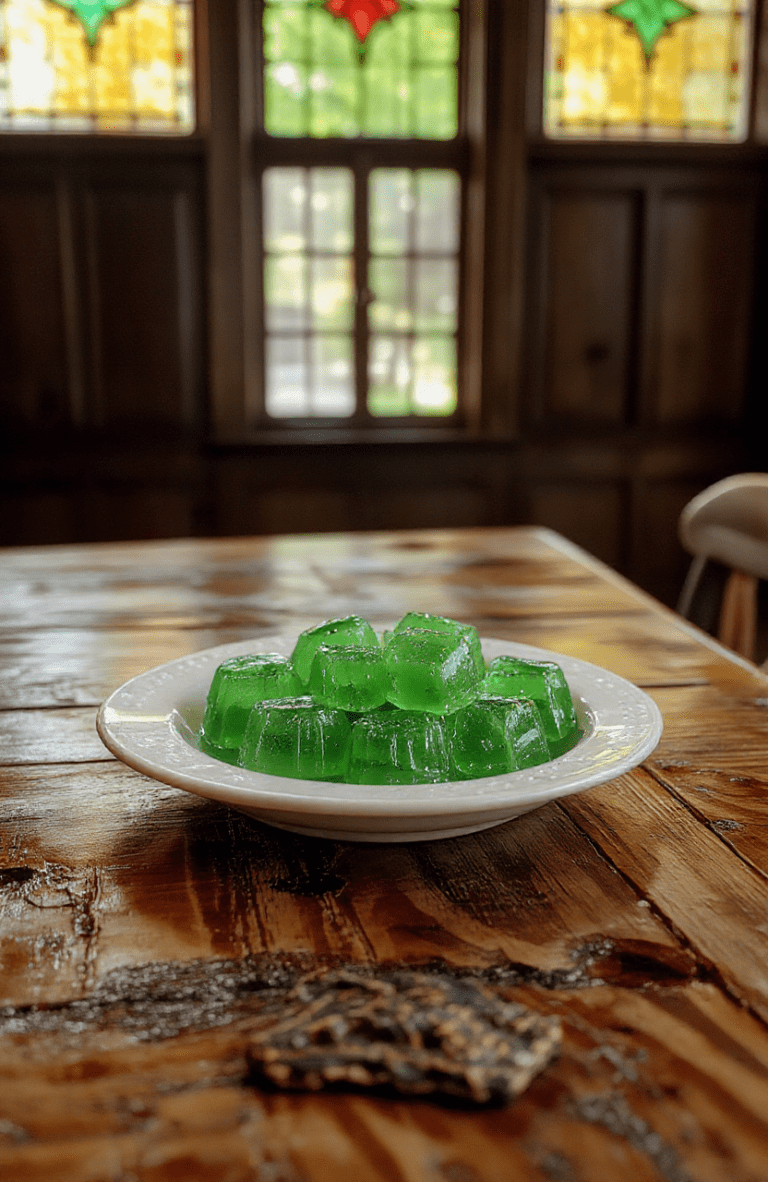
Step into the Emerald City with these dazzling emerald mint jellies inspired by the legendary Elphaba—the green-wielding, rule-breaking sorceress from Wicked. These jellies aren’t just a candy—they’re a *experience*: vibrant, jiggly, mint-fresh, and subtly sweet with a crisp fruit-forward tang. Perfect for movie nights, theatrical gatherings, or just when you need a little magical thrill in your day, these jellies deliver on flavor *and* whimsy.
I’ve tested dozens of jelly recipes over the years, and this one stands out because it balances clean mint flavor with just enough fruit brightness to keep it from tasting like toothpaste. They shimmer with edible gold dust (optional—but *highly* recommended for that Wicked-grade sparkle) and set in under two hours.Ready to cast a spell with sugar and syrup? Let’s get started.
2. Why You’ll Love This Recipe
- Ready in Under 30 Minutes (Plus Chill Time) — No complicated steps.Boil, stir, pour, chill, cut, and serve.
- Only 6 Simple Ingredients — No hard-to-find specialty gums or gelling agents.
- Perfect For Themed Parties — Shrek nights, drag shows, St. Patrick’s Day, or just because you love green.
- Customizable Intensity & Sweetness — Adjust peppermint extract and sugar to taste.
- Gluten-Free & Vegan-Friendly — Swap gelatin for agar-agar for plant-based magic.
- Dazzling Visual Impact — They catch the light like gemstones.
3. Kitchen Tools You Need
While you *could* make these in a basic bowl, using the right tools makes the process smoother, cleaner—and honestly, more fun. Here’s what I rely on in my recipes (affiliate links included, but don’t worry—your local kitchen store works too!):
- Compact 6-in-1 Digital Air Fryer by Amazon Basics — Though we’re not air-frying here, this little powerhouse doubles as a proofing box when your kitchen’s too cold (set it to “Dehydrate” at 95°F and place the jellies inside for a faster, more even set).
- T-fal 14-Piece Hard Anodized Nonstick Cookware Set — I love this set for sauce-heavy recipes like this. The tight-fitting lid traps steam for even boiling, and the nonstick surface makes cleanup a breeze—no burnt sugar residue!
- Ninja SLUSHi Pro RapidChill Drink Maker — If you want *shavings* of mint or fruit zest for texture (optional garnish), this thing crush ice in seconds and works wonders for fresh herb infusion. Add some mint leaves and pulse to harvest that bright, green dust.
- JoyJolt Airtight Glass Food Storage Set — Store leftovers in these elegant jars. Glass prevents odor transfer (mint tends to *linger*, as any lavender-chaser knows), and the lids keep the jellies from drying out.
- Fullstar Ultimate Veggie Prep Master — Fine-grating fresh mint leaves releases maximum oil—no more chewy, fibrous bits in your jellies. Just chop, press, and go.
4. Ingredient Notes
Each component in this recipe plays a critical role—not just for setting, but for *flavor layering*:
- Fruit Juice Base (I use white grape + lime juice) — Clear juices keep the emerald hue true. Avoid orange or cranberry—they’ll muddy the green. White grape adds subtle sweetness without overpowering; lime juice gives a bright lift that cuts through the mint’s cooling effect.
- Unflavored Gelatin (or Agar-Agar for Vegan) — Bloom properly! Sprinkle it over cold liquid first, then stir into warm (not boiling) mixture. Boiling gelatin breaks it down and weakens set. Agar-agar requires 5 minutes of rolling boil to activate—don’t skip this step.
- Granulated Sugar (or Honey/Agave) — Fine granules dissolve fastest. If you want extra shimmer, swap 1 tbsp for raw turbinado. I’ve found superfine sugar gives the smoothest texture.
- Peppermint Extract (NOT essential oil) — Extracts deliver safe, balanced flavor. Essential oils are *far* too concentrated and can be toxic. I prefer Nielsen-Massey or Watkins—both have robust, clean notes that don’t taste like toothpaste.
- Green Food Coloring (Liquid or Gel) — Use a *teal-leaning* green. Too yellow? Looks like banana candy. Too blue? Looks like Slime Time slime. I mix 3 parts gel green + 1 part ultramarine blue for that true Emerald City glow.
- Edible Gold Dust (Optional) — Not just for looks—it adds a whisper of mineral sweetness. Brush lightly *after* jellies set (or skip it and leave them naturally shimmering).
5. How to Make Wicked Elphaba Emerald Mint Jellies
Phase 1: Prep & Bloom
Start by preparing your mold. I use a 9×9 inch glass pan lined with parchment (leave overhang for easy lift-out), but jelly molds, shot glasses, or even ice cube trays work beautifully. Lightly oil the pan with neutral oil (like grapeseed or coconut), then dust with a * tiny* bit of powdered sugar—this prevents sticking without clouding the color.
Next, prepare the gelatin bloom: In a bowl, combine ½ cup cold water and 2 tablespoons unflavored gelatin. Let it sit for 5 minutes until spongy and swollen. No rushing this—it’s the secret to clean, wobble-free jellies.
Phase 2: Infuse & Dissolve
In a small saucepan, combine 1 cup white grape juice, ½ cup lime juice, and ½ cup sugar. Heat over medium, stirring until sugar dissolves—about 3 minutes. Do not boil yet.
Remove from heat. Add the bloomed gelatin and stir vigorously for 1–2 minutes until fully dissolved. The mixture should be perfectly clear, no cloudiness. Add 3 drops green food coloring + 1 drop blue, then stir.
Now, the magic: stir in 1½ teaspoons peppermint extract. Yes—that’s the whole amount. Mint flavor intensifies as it chills, so under-doing it is safer than overpowering.
Phase 3: Pour & Chill
Pour carefully into the prepared pan. For extradimensional effect, gently swirl in a few drops of gold luster dust using a toothpick. Let cool at room temperature for 15 minutes, then refrigerate for 1.5–2 hours, or until fully set and firm to the touch (not tacky).
Phase 4: Cut & Serve
Lift jelly out using parchment overhang. Peel gently, then use a sharp knife (dipped in hot water and dried between cuts) to slice into squares or use cookie cutters for potion-bottle shapes. Dust lightly with powdered sugar or edible glitter right before serving.
6. Expert Tips for Success
- Avoid the “weepy jelly” phenomenon — Humidity is the arch-nemesis! If your kitchen is steamy (like a witch’s cauldron on a rainy night), chill your mold first or use a fan to circulate air.
- Don’t whisk air into the mix — Stir, don’t whisk, after adding extract. Whipping introduces bubbles that ruin the glassy look.
- Taste the base before gelling — After dissolving gelatin, dip a spoon and chill it 1 minute. The flavor should be bright, mint-forward, and *slightly* tart—balance comes from cooling, not extra sugar.
- Use distilled water if your tap is hard — Minerals can interfere with gelatin’s structure, causing weak sets.
- For vegan version — Replace gelatin with 2 tsp agar-agar powder + 1 tsp fine salt (salt helps agar set firmer). Bring to a full rolling boil for 2 minutes after adding.
7. Variations & Substitutions
- Spiced Emerald Jellies — Add a pinch of cinnamon or cardamom with the sugar for warmth that cuts mint’s bitterness.
- Citrus Sparkle — Swap ¼ cup juice for blood orange or yuzu—the pink-green gradient is stunning and adds complexity.
- Mint Chip Twist — Swirl in crushed vegan dark chocolate chips or chopped candied mint leaves for textural contrast.
- Alcohol-Infused (For Adults Only) — Add 1 oz peppermint schnapps + 1 oz white rum toward the end. Reduce water by 2 tbsp. Chill for 3 hours—alcohol slows set.
- No Juice? Try Coconut Water — It’s naturally sweet and clears beautifully. Add a squeeze of lemon to balance pH for proper gelling.
8. Storage & Reheating
Store in an airtight container, separated by parchment, in the fridge for up to 5 days. These jellies don’t freeze well—the ice crystals break the gel structure, making them grainy on thaw.
Bring to room temperature for 10 minutes before serving for optimal texture—cold jellies can feel waxy. If bề mặt looks dried, brush with a light mist of simple syrup before dusting with sugar.
9. FAQ
Q: Why are my jellies cloudy?
A: Likely due to uneven gelatin dissolution or adding extract to boiling liquid. Always bloom gelatin fully, and remove from heat before adding flavorings. Use filtered water if tap water is hard.
Q: Can I make these ahead?
A: Yes! Prepare up to 4 days in advance. Assemble before guests arrive—cutting and sugar-dusting right before serving keeps them shiny and fresh.
Q: My jellies didn’t set. What went wrong?
A: Three common culprits: temperature (too hot when gelatin added), insufficient chilling time (never rush it), or old gelatin (test it by blooming a small amount—if it doesn’t firm up, buy fresh).
Q: Can I use mint tea instead of extract?
A: Absolutely—but steep 2 bags in ½ cup hot water, cool, and reduce juice amount by 2 tbsp. You’ll lose some brightness, so boostlime to ⅓ cup.
10. Conclusion
These emerald mint jellies are more than a sweet treat—they’re a celebration of flavor, color, and fun. Whether you’re hosting a Wicked-themed dinner, throwing a St. Patrick’s splash party, or just craving a minty twist, they bring magic to the table in every jiggly bite. Pair them with Shrek’s Swamp Onion Dip for a savory-sweet journey—or serve them solo under a spotlight (and maybe a sprig of mint).
Cast your spell, and let the green glow begin.
Wicked Elphaba Emerald Mint Jellies
Glowing emerald mint jellies inspired by Wicked’s Elphaba—vibrant, minty, and magical, perfect for fans seeking a magical treat with a modern twist.
- Total Time: 235 minutes
- Yield: 16 servings
Ingredients
- 1 cup fresh mint leaves, packed
- 1 cup boiling water
- 2 tablespoons unflavored gelatin
- 1/2 cup granulated sugar (or to taste)
- 1/4 cup water
- Green food coloring (or matcha for natural hue), optional
- Dried mint leaves for garnish
Instructions
- In a heatproof bowl, steep fresh mint leaves in boiling water for 10 minutes. Strain and discard leaves.
- Return mint-infused water to bowl and sprinkle gelatin over surface. Let bloom 5 minutes.
- In a small saucepan, combine sugar and 1/4 cup water. Heat gently until sugar dissolves (do not boil). Pour into mint water and stir until fully dissolved.
- Stir in food coloring (if using) until vibrant emerald green.
- Pour into a lightly oiled 8×8-inch pan or silicone mold. Refrigerate 3–4 hours until set.
- Cut into cubes, dust with dried mint, and serve with dry ice mist for dramatic flair (handle dry ice safely).
Notes
- Use matcha powder (1/2 tsp) for a natural green tone and subtle earthiness.
- For a vegan version, substitute agar-agar for gelatin (use 2 tbsp agar, boil 2 minutes).
- Dry ice adds theatrical effect but must be handled with gloves and used in well-ventilated areas—never consume directly.
- Prep Time: 15 minutes
- Cook Time: 10 minutes
- Method: Chilled set
- Cuisine: American
- Diet: Vegetarian
Nutrition
- Serving Size: 1 cube
- Calories: 22 Kcal
- Sugar: 5 g
- Sodium: 1 mg
- Fat: 0 g
- Saturated Fat: 0 g
- Unsaturated Fat: 0 g
- Trans Fat: 0 g
- Carbohydrates: 6 g
- Fiber: 0 g
- Protein: 0 g
- Cholesterol: 0 mg
