
🐝Winnie the Pooh Honey Pot Cupcakes 🍯 – Sweet, Sunny, and Pure Nostalgia in Every Bite!
1. Introduction
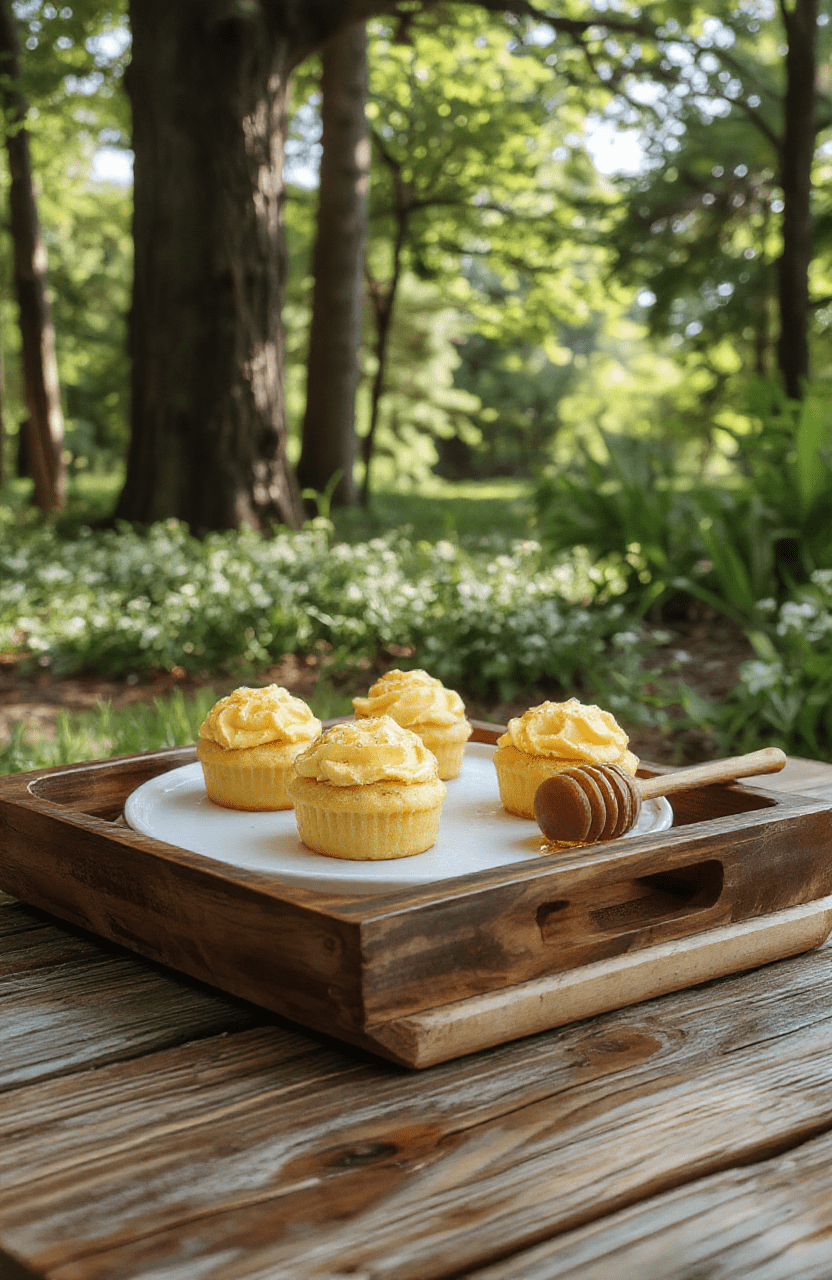
There’s something inherently joyful about these Winnie the Pooh Honey Pot Cupcakes—golden butter cake crowned with a honey-kissed buttercream and a shimmering “honey drip” that glistens like sunlight on a real pot of comb honey. These aren’t just cupcakes; they’re a children’s tea party dessert made magical, a children’s birthday cupcake that sparks smiles from 100 Acre Wood all the way to your kitchen counter. Inspired by the beloved classic, each cupcake is a little edible tribute to Christopher Robin’s favorite friend, complete with edible honeycomb textures, fondant honey jars, and a taste that’s rich, buttery, and softly floral. This recipe is perfect for birthdays, baby showers, storytime gatherings—or any day you just need a little sweetness in your life.
2. Why You’ll Love This Recipe
- ✅ Ready in under 45 minutes (including cooling time!)—ideal for last-minute party prep.
- ✅ No fancy equipment needed—just a standard muffin tin and offset spatula (though a KitchenAid Artisan Stand Mixer makes creaming butter and sugar effortless).
- ✅ Fondant-free option for beginners or time-crunched bakers (we’ll use piped honey pots instead).
- ✅ Customizable for allergies—swap dairy or GF flour easily (see variations below).
- ✅ Foolproof frosting technique with step-by-step visuals described for visual learners.
3. Kitchen Tools You Need
While you can make these with basic tools, a few well-chosen gadgets will elevate your results—and save time. The KitchenAid Artisan Stand Mixer ensures your buttercream is light and airy without overWORKING the sugar crystals. For precise piping, I recommend a set ofquality piping bags and tips—but if you’re starting out, the Deluxe 33-Piece Silicone Utensil Set includes generous disposable bags with handy couplers. A reliable Compact 6-in-1 Digital Air Fryer can even toast coconut flakes for texture (if you’re making mini honeycomb clusters), though your oven works just fine. And when storage time comes, the JoyJolt Airtight Glass Food Storage Set keeps frosted cupcakes fresh for up to 3 days.
4. Ingredient Notes
Let’s talk quality—because texture and flavor are everything here.
The star is, of course, raw honey. Use a light, floral honey like orange blossom or clover (not dark buckwheat, which can overpower). If you can source local raw honey, even better—it adds complexity and a touch of gold flecks that make your “honey drip” look authentically rustic.
For the cake, cake flour is_key for a tender crumb. If you only have all-purpose, replace 2 tablespoons of flour per cup with cornstarch. Unsalted butter, well-chilled but soft, gives the best structure for both cake and frosting.
Fondant? Optional. But if you’re shaping mini honey jars, edible gold dust (a pinch mixed with food-grade brush cleaner) makes the pots sparkle. For a more natural glint, use edible pearl dust in honey-gold tones.
5. How to Make Winnie the Pooh Honey Pot Cupcakes
Phase 1: Bake the Honey-Scented Cupcakes
Preheat oven to 350°F (175°C) and line a muffin tin with pale yellow or white cupcake liners—bright white makes the honey tones sing. In a bowl, whisk 1½ cups cake flour, 1½ tsp baking powder, and ¼ tsp salt. In another bowl, cream ½ cup unsalted butter and ¾ cup raw honey until fluffy (3 mins with a hand mixer). Add 2 eggs, one at a time, then 1 tsp vanilla and 2 tbsp milk. Alternate adding the dry ingredients and ¼ cup more milk, beginning and ending with flour. Fill liners **¾ full**—they’ll rise beautifully.
Bake 16–18 minutes. When done, the edges pull away slightly from the pan, and a toothpick comes out clean. Let cool in pan 5 minutes, then transfer to a wire rack.
Phase 2:霜 the Honey Buttercream
Whip ¾ cup softened butter until pale (3 mins). Gradually add 3 cups powdered sugar, 1 tbsp honey, 1 tsp vanilla, and 2 tbsp heavy cream. Beat on high until light and fluffy—not stiff, but holdable. Taste and adjust: too sweet? Add a pinch of salt. Too thick? A splash more cream.
For the “honey drip”: Warm 2 tbsp honey with 1 tsp light corn syrup (or maple syrup), stir until smooth, then cool 5 minutes. Pipe a ring of buttercream around the top rim of each cooled cupcake, pour a thin circle of warm honey in the center, and let it slowly cascade down the sides. Watch it set—it’ll thicken in 2–3 minutes to a glossy, amber glaze.
Phase 3: Add the Honey Pots (Three Easy Ways)
- Fondant Pot (Classic): Roll yellow fondant, cut a 2” circle, press into a mini jar lid or mold, let dry 30 mins. Add golden edible dust and top with a tiny fondant label: “Pooh.”
- Piped Buttercream Pot (Beginner-Friendly): Fit a star tip (Wilton 1M) in a piping bag, pipe rounded “jars” filled with buttercream, then spoon a bit of remaining honey top.
- Cookie Jar Top (Rustic & Cute): Use mini golden Shortbread rounds (store-bought or made from our honey cookie hack), drape over cupcake with a dab of frosting.
6. Expert Tips for Success
1. Avoid soggy drip: Let cupcakes cool *completely* before adding honey. Warm cake = melted honey = no structure.
2. Honey won’t set if too warm: Chill frosted cupcakes 10 minutes before serving to “lock” the drip.
3. Color matters: If your buttercream Looks yellow, reduce honey in frosting or add 1 tsp white gel coloring.
4. Stick it to the cupcake: Use a tiny dot of frosting to “glue” fondant or cookie lids on—gravity helps no one when kids reach in!
7. Variations & Substitutions
Gluten-Free: Use 1:1 GF flour blend (we love Bob’s Red Mill) + ½ tsp xanthan gum.
Dairy-Free: Swap butter for vegan shortening and use oat milk + coconut cream in frosting.
Lower Sugar: Reduce powdered sugar to 2 cups, boost honey to 2 tbsp + add ½ tsp lemon zest for brightness.
Flavor Twists: Add 1 tsp orange zest to cake batter (Pooh *adores* citrus), or swirl 1 tbsp caramel sauce into each cupcake well before baking.
8. Storage & Reheating
Store unfrosted cupcakes at room temp 2 days. Frosted (with honey drip) keep up to 3 days refrigerated— cover loosely with plastic. Bring to room temp 30 minutes before serving for best texture.
Freezing: Wrap unfrosted cupcakes in plastic + foil; freeze up to 1 month. Thaw overnight in fridge,then frost.
⚠️ Honey drip loses gloss after reheating—never microwave frosted cupcakes. Revive with a light brush of warmed honey after thawing.
9. FAQ
Q: Can I make these in an air fryer?
A: Yes! Use mini muffin tin inserts and bake at 325°F for 10–12 minutes—watch closely. Air fryers brown faster, so tent with foil if edges get too golden.
Q: Why did my honey drip run off the cupcake?
A: Likely two reasons: (1) Cake was still warm, or (2) Honey was too hot (over 110°F). Always cool蜜 before drizzling.
Q: What if my fondant cracks?
A> Roll it thicker (¼ inch) and add a bit of shortening when kneading. Or skip it entirely—our piped “pot” hack is just as charming.
Q: Can I use this batter for a full-sized cake?
A> Absolutely! Doubling makes a 9×13” cake or two 8” rounds. Bake 25–30 mins. Add honey drip at the end for a stunning centerpiece.
10. Conclusion
These Winnie the Pooh Honey Pot Cupcakes are more than just dessert—they’re a moment. A quiet reminder to savor life’s sweetest little things: golden afternoon light, shared treats, and the laughter of kids (or adults!) pretending to be bears in 100 Acre Wood. Whether it’s for a birthday party, a whimsical baby shower, or just because Tuesday feels like a Saturday, these cupcakes deliver pure, unapologetic joy—one bite at a time.
Tag us on Instagram @hollywoodrecipes if you try them—we’d love to see your honey pots!
P.S. Craving more beloved-character treats? Dive into our Shrek Gingy’s Gumdrop Button Cookies, Beorn’s Honey Cakes, or Sydney’s Cola-Braised Short Ribs for a full cinematic snack menu.
Print
Winnie the Pooh Honey Pot Cupcakes
Moist honey cake cupcakes topped with vanilla buttercream and edible honey pot lids, finished with bees and honey drizzle—perfect for Pooh lovers of all ages.
- Total Time: 1 hour 10 minutes
- Yield: 12 cupcakes
Ingredients
- 1 cup all-purpose flour
- 1 tsp baking powder
- ½ tsp baking soda
- ¼ tsp salt
- ½ cup unsalted butter, softened
- ¾ cup honey
- 2 large eggs
- 1 tsp vanilla extract
- ½ cup whole milk
- ¼ cup plain Greek yogurt
- 2 tbsp honey (for syrup)
- 1 tsp lemon juice
Instructions
- Preheat oven to 350°F (175°C). Line a 12-cup muffin tin with cupcake liners.
- Whisk flour, baking powder, baking soda, and salt in a bowl.
- Beat butter and ¾ cup honey until light and fluffy. Add eggs one at a time, then mix in vanilla.
- Alternately add dry ingredients and milk/yogurt mixture, starting and ending with dry ingredients. Mix until just combined.
- Divide batter evenly among liners (fill ⅔ full). Bake 16–18 minutes until a toothpick comes out clean.
- Let cool 5 minutes, then transfer to a wire rack. Mix 2 tbsp honey with lemon juice for syrup; brush lightly over cooled cupcakes.
- Frost with vanilla buttercream and pipe a honey pot lid shape using yellow fondant. Add edible bees and drizzle with honey.
Notes
- For vegan option: substitute butter with coconut oil, eggs with flax eggs (1 tbsp ground flax + 3 tbsp water per egg), and use agave instead of honey.
- Fondant lids can be made ahead and stored in an airtight container for up to 3 days.
- Garnish with edible gold dust for extra shimmer.
- Prep Time: 20 minutes
- Cook Time: 18 minutes
- Method: Baking
- Cuisine: American
- Diet: Vegetarian
Nutrition
- Serving Size: 1 cupcake
- Calories: 285 Kcal
- Sugar: 22g
- Sodium: 140mg
- Fat: 13g
- Saturated Fat: 8g
- Unsaturated Fat: 4g
- Trans Fat: 0g
- Carbohydrates: 38g
- Fiber: 1g
- Protein: 4g
- Cholesterol: 50mg
