

Spooky Stranger Things Upside Down Cookies 🧇🌀
1. Introduction
These Stranger Things cookies are a playful, spooky tribute to the hit series. They marry a rich, fudgy chocolate aroma with a soft, chewy center and a crisp edge that crackles as you bite. The look is just as exciting as the flavor—a dark, moody exterior that hints at the Upside Down, with a ghostly dusting of powdered sugar for contrast. If you’re after a Halloween cookies recipe that sparks conversation, you’ve found it in this batch of Stranger Things cookies.
The first bite releases a burst of cocoa and vanilla, followed by a melt-in-your-mouth center. You’ll notice how the aroma fills the kitchen as the dough bakes, inviting friends to gather around the tray. It’s comfort, nostalgia, and a touch of eerie drama all in one treat.
2. Why You’ll Love This Recipe
- Ready in about 30 minutes from start to finish.
- One-bowl dough with minimal cleanup for a quick bake session.
- Striking, photo-worthy cookies that fit perfectly into a Halloween party spread.
- Chewy center, crisp edges, and a dramatic dark look that screams spookiness without being too sweet.
- Versatile: easy to adapt for vegan or gluten-free diets with simple swaps.
3. Kitchen Tools You Need
These tools help you achieve evenly baked, perfectly shaped cookies that look as good as they taste. Each tool also pairs nicely with other treats you might bake for a movie-night lineup.
- Non-stick silicone baking mat keeps dough from sticking and ensures even browning, plus makes cleanup a breeze.
- Sturdy cooling rack lets air circulate under the cookies so they cool evenly and don’t get soggy bottoms.
- Cookie scoop helps you portion dough evenly for uniform, professional-looking rounds.
- Parchment paper or silicone liner is a must for quick cleanup and even baking on baking sheets.
- A reliable airtight container keeps your Halloween cookies recipe fresh for days; you can stash a few for a weekend movie night.
4. Ingredient Notes
Quality ingredients elevate these cookies from good to memorable. I lean into a deep chocolate flavor balanced by vanilla and a touch of salt to sharpen the sweetness.
- Butter – Use unsalted, softened to room temperature for smooth creaming and a rich, creamy texture. If you only have salted butter, reduce the added salt by a pinch.
- Sugars – A mix of granulated sugar and light brown sugar gives a chewy bite and a caramel note that complements the cocoa.
- Cocoa powder – Dutch-processed or natural cocoa will work; for a velvety, intense color and flavor, opt for Dutch-processed.
- Flour – All-purpose flour provides structure without heaviness. For gluten-free readers, try a 1:1 GF blend and add an extra teaspoon of cocoa for richness.
- Egg – One large egg binds the dough and contributes to a tender crumb. If you’re vegan, substitute with flax egg or a commercial egg replacer appropriate for baking.
- Extras – White chocolate chips or mini chocolate chips create playful “eyes” or spots in the cookie surface. A light dusting of powdered sugar adds a ghostly effect for the Halloween vibe.
- High-quality options – Look for European-style butter for a richer flavor or consider a premium cocoa for a deeper color and aroma. A dash of sea salt at the end brightens the chocolate beautifully.
5. How to Make [Recipe Name]
Follow this narrative walkthrough to achieve a glossy, well-shaped batch that looks as good as it tastes. You’ll notice cues like aroma, color, and texture that signal timing and doneness.
Phase 1 — Prep and cream
Preheat your oven to 350°F (175°C) and line a baking sheet with a parchment or silicone mat. In a bowl, cream the butter with granulated sugar and brown sugar until light and fluffy. The mixture should look airy and pale, with a fragrant vanilla glow from the vanilla extract.
Phase 2 — Combine wet and dry
Beat in the egg until fully incorporated. In a separate bowl, whisk together flour, cocoa powder, baking soda, and salt. Gradually fold the dry ingredients into the wet until a thick dough forms. The dough should come together and look glossy but not wet.
Phase 3 — Chill and portion
Wrap the dough and refrigerate for 30–60 minutes. Chilled dough holds its shape better, producing evenly round cookies with crisp edges. When ready, use a cookie scoop to portion evenly and roll into balls.
Phase 4 — Bake and refine
Place dough balls on the prepared sheet, spacing about 2 inches apart. Bake 9–11 minutes, until the edges are set and the centers look just a touch soft. The cookies will firm up as they cool, revealing a deep mahogany color and a slight crackle on top.
Phase 5 — Finish and decorate
While still warm, press a few white chocolate chips onto the surface to look like eerie eyes, or dust lightly with powdered sugar for a ghostly finish. Let the cookies cool completely on a rack before storing. The aroma will be rich, with cocoa and vanilla notes that make you linger at the oven door.
6. Expert Tips for Success
- Chill the dough well. It minimizes spreading and helps preserve thick, chewy centers.
- Measure flour correctly. Spoon into the cup and level off for accurate texture—too much flour makes the cookies dry.
- Don’t overmix after adding dry ingredients; mix just until combined to keep the cookies tender.
- Use parchment or a silicone liner for clean release and even browning.
- If you want a stronger Halloween vibe, increase the cocoa by a tablespoon and add a touch more vanilla for aroma warmth.
7. Variations & Substitutions
– Swap in white chocolate chips for a pale contrast that looks like frost on the cookie surface. – Add a pinch of espresso powder for a more pronounced chocolate kick, or swap vanilla extract for almond for a different aroma profile.
8. Storage & Reheating
Store baked cookies in an airtight container at room temperature for up to 5 days. For longer storage, freeze baked cookies for up to 2 months, then rewarm in a 300°F (150°C) oven for 5–7 minutes to refresh the texture.
To lock in freshness before baking, you can freeze the dough for up to 2 months. Thaw briefly, re-roll, and bake as directed. This is perfect for holiday prep or a last-minute batch of spooky treats.
9. FAQ
Q: What makes these cookies “Spooky Stranger Things Upside Down Cookies”?
A: They feature a rich chocolate flavor with a dramatic, dark exterior and a soft center, plus a light dusting of powdered sugar to give a ghostly contrast reminiscent of the Upside Down forest.
Q: Can I make these ahead of time?
A: Yes. You can bake them and store in an airtight container for up to 5 days, or freeze the dough and bake fresh later. This keeps flavors vibrant and textures at their best.
Q: How do I achieve the best texture?
A: Cream the butter and sugars thoroughly, measure flour accurately, and chill the dough before baking. This keeps centers chewy while ensuring crisp edges and a glossy surface.
Q: Are these suitable for Halloween parties?
A: Absolutely. The dark color, ghostly dusting, and bite-sized shape make them a crowd-pleasing centerpiece for a spooky spread.
10. Conclusion
Spooky Stranger Things Upside Down Cookies bring a playful fright and a comforting bite to any Halloween lineup. With a chewy center, crisp edges, and a moody chocolate flavor, they’re the kind of treat that begs to be shared on movie night and at gatherings. Bake a batch, dust with a little sugar, and let the aroma transport you to a dimly lit, cozy Halloween evening.
Print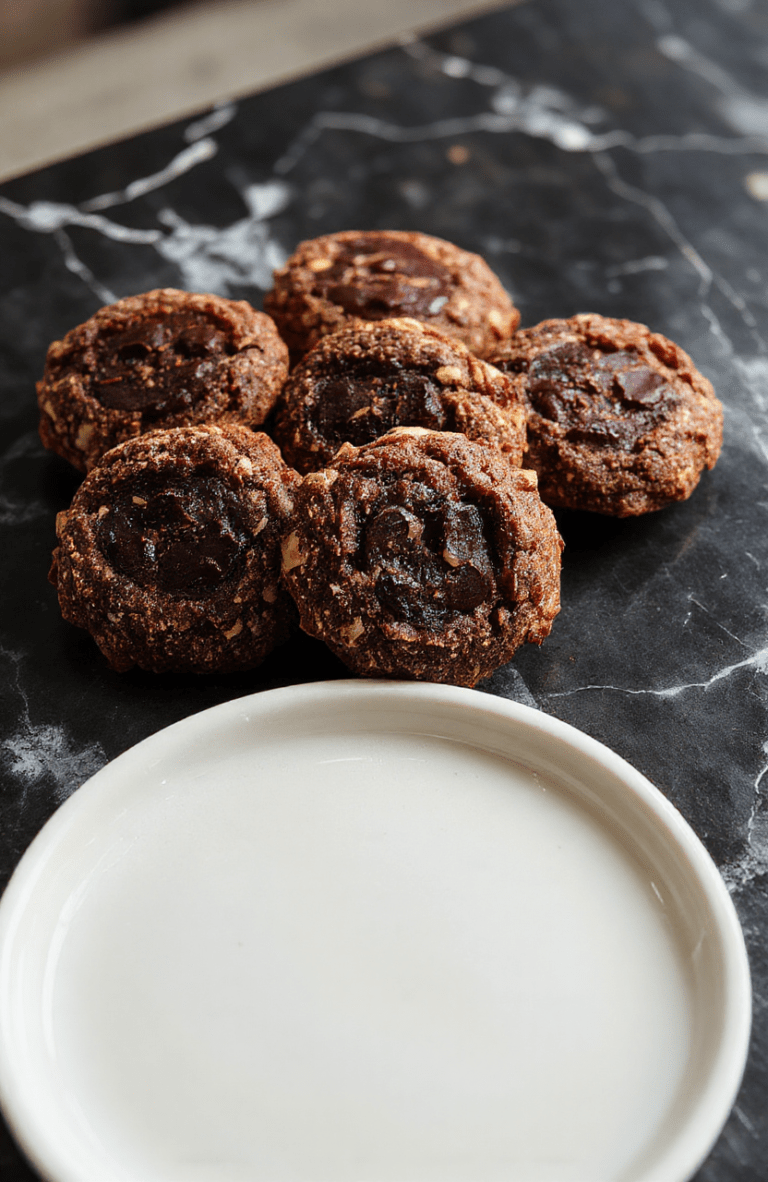
Spooky Stranger Things Upside Down Cookies 🧇🌀
Spooky Stranger Things Upside Down Cookies are chocolate sandwich cookies with a bright mint center, inspired by the Upside Down. They bake up crisp-edged and soft-centered, then are filled and stacked to resemble the eerie parallel world. A fun, crowd-pleasing dessert for Halloween, movie nights, and thematic parties.
- Total Time: 35 minutes (plus chilling)
- Yield: 24 cookies
Ingredients
- 1 cup unsalted butter, softened
- 1 cup granulated sugar
- 1/2 cup packed brown sugar
- 2 large eggs
- 2 teaspoons vanilla extract
- 2 1/2 cups all-purpose flour
- 3/4 cup cocoa powder
- 1 teaspoon baking soda
- 1/2 teaspoon salt
- 1 cup dark chocolate chips
- 1/2 cup mint buttercream or green frosting for centers
- Powdered sugar for dusting (optional)
Instructions
- Preheat oven to 350°F (175°C). Line baking sheets with parchment.
- Cream together butter, granulated sugar, and brown sugar until light and fluffy.
- Beat in eggs one at a time, then mix in vanilla.
- Whisk dry ingredients (flour, cocoa, baking soda, salt) and gradually add to wet ingredients to form a thick dough.
- Chill dough 20-30 minutes for easier handling.
- Scoop tablespoons of dough onto sheets and bake 9-11 minutes until edges are set.
- Cool completely, spread mint center on one cookie, and sandwich with a second cookie to form an “Upside Down” look.
- Dust with powdered sugar and optional melted chocolate drizzle for extra spooky effect.
Notes
- Chill dough to reduce spreading.
- Do not overbake; centers should remain soft for easier sandwiching.
- Store in an airtight container for up to 3 days.
- Prep Time: 15 minutes
- Cook Time: 10-11 minutes per batch
- Method: Bake and assemble sandwich cookies
- Cuisine: American
- Diet: Vegetarian
Nutrition
- Serving Size: 1 cookie
- Calories: 110 calories
- Sugar: 12 g
- Sodium: 70 mg
- Fat: 6 g
- Saturated Fat: 3 g
- Unsaturated Fat: 2 g
- Trans Fat: 0 g
- Carbohydrates: 17 g
- Fiber: 1 g
- Protein: 2 g
- Cholesterol: 25 mg
