

🍃🌿 Easy Hobbiton Herb Bread Recipe 🌿🍞
1. Introduction
Welcome, fellow fans of Middle-earth. This Hobbiton herb bread recipe is a cozy, crusty loaf that tastes like a walk through a sunlit hobbit-hole. It blends meadow-green herbs with a soft, tender crumb and a whisper of garlic that lingers on the palate. If you’re searching for a Lord of the Rings themed bread or an easy herb bread recipe for fans, you’ve found a comforting companion for your next dinner or movie night.
As you pull the loaf from the oven, the kitchen fills with aromas of thyme, rosemary, and warm bread. The crust crackles softly when you tap it, and the inside stays incredibly moist and fragrant. It’s the kind of bread that invites you to slice, smear, and savor in big, leisurely bites.
2. Why You’ll Love This Recipe
- Ready in about 1 hour from start to finish, perfect for weeknights or a Hobbit-inspired feast.
- One-loaf meal that pairs beautifully with soups, stews, or a simple herb butter.
- Soft, aromatic crumb with a gently crisp crust that stays tender for hours.
- Flexibly uses common pantry herbs, so you can customize for your own fandom menus.
- Hey, it’s a fun nod to the Lord of the Rings universe without requiring any special equipment.
3. Kitchen Tools You Need
Gather these trusty tools to make the Hobbiton herb bread recipe feel effortless. A reliable mixer helps if you’re kneading by hand is not your favorite, and a digital scale keeps everything precise for consistent rises. You’ll also want a sturdy baking sheet or loaf pan, a dough scraper, and a pastry brush for a shiny finish.
For extra flavor inspiration and to keep your culinary adventures connected to the fantasy fan world, check out these related posts: Bluey’s Crunchy Roasted Pumpkin Seeds, Cheesy Encanto Arepas, Easy Disney Cars Movie Night, Cheesy Harry Potter Ale Bread, Easy Disney Mulan Mini Breakfast Treats.
4. Ingredient Notes
This recipe shines when you choose ingredients that deliver depth without complexity. Use bread flour for a sturdy structure that encourages a nice rise, or all-purpose flour if you prefer a softer crumb. Fresh herbs—rosemary, thyme, chives—bring a bright, aromatic profile reminiscent of a sunlit Shire garden. If you only have dried herbs, halve the amount and crush them between your fingers to release aroma.
For enrichments, a little extra-virgin olive oil adds tenderness and richness, while a touch of honey or sugar feeds the yeast and helps browning. Sea salt flakes sprinkled lightly on top after shaping gives a satisfying sparkle and taste contrast. If you want a cheesy angle, a modest handful of grated hard cheese can boost savoriness without overpowering the herb balance.
Quality yeast matters. Instant or active dry yeast both work, but proofing active dry yeast in warm water for a few minutes ensures your dough will rise reliably. Water should feel warm to the touch, not hot, to nurture the yeast without killing it.
5. How to Make [Recipe Name]
Phase 1: Activate and prepare
Warm water to about 105–110°F (40–43°C) and whisk in a touch of sugar. Sprinkle in the yeast and let it bloom for 5–10 minutes until the surface is foamy. This aroma-rich moment tells you the yeast is alive and ready to go.
Phase 2: Mix and knead
In a large bowl, combine flour, chopped fresh herbs, a pinch of salt, and olive oil. Pour in the bloomed yeast mixture and stir until a shaggy dough forms. Knead 6–8 minutes by hand or 4–5 minutes with a stand mixer until the dough is smooth and springy to the touch. You should see a slight sheen on the surface as gluten develops.
Phase 3: First rise and shape
Shape the dough into a round or oblong loaf and place it on a parchment-lined baking sheet or in a lightly oiled loaf pan. Cover with a damp towel or plastic wrap and let it rise in a warm spot for 25–40 minutes, until it puffs and nearly doubles in size. You’ll notice the dough spring back gently when pressed with a finger.
Phase 4: Bake and finish
Preheat the oven to 425°F (220°C). Brush the top with a light coating of olive oil or an egg wash for a shiny crust. Bake for 22–28 minutes, until the loaf is deeply golden and the crust sounds hollow when tapped. A quick glance should reveal a beautifully domed top and a crackly surface that invites you to slice.
6. Expert Tips for Success
- Weigh ingredients for consistent texture. A digital scale makes a big difference in bread baking, especially with herbs where you want even distribution.
- Hydration matters. If your dough seems dry, add a tablespoon of water at a time until it comes together and feels supple.
- A gentle rise is better than a fast one. If your kitchen is cool, let the dough rise slowly and covered in a warm spot to deepen flavor.
- Steam helps crust formation. You can place a small pan with hot water in the oven during the first 10 minutes of baking to create a crisper crust.
- Resting the dough briefly after shaping improves structure. A short 10–15 minute bench rest helps with scoring and even baking.
7. Variations & Substitutions
- Herb variations: swap in basil and marjoram for a lighter, springtime note. Add a pinch of lemon zest for brightness.
- Cheesy option: fold in 1/4 cup grated Parmesan or aged cheddar for a savory crust with bite.
- Gluten-free adaptation: try a trusted gluten-free bread flour blend and adjust hydration, since GF dough behaves differently.
- Dairy-free: skip dairy and use an extra teaspoon olive oil or dairy-free butter substitute for tenderness.
8. Storage & Reheating
Store bread in a clean tea towel at room temperature for up to 2 days. For longer storage, slice and freeze in an airtight bag, then reheat slices in a toaster or oven until warm and aromatic. A light brush of butter after toasting heightens the aroma and crust.
9. FAQ
Q: Can I freeze the dough before the first rise?
A: Yes. Freeze after kneading and a brief rise; thaw completely, then let it rise again before shaping and baking as directed.
Q: What should the dough look like when ready to bake?
A: It should be visibly puffy, about 1.5 times its original size, with a slightly springy feel when touched.
Q: Is this bread good for beginners?
A: Absolutely. The ingredient list is simple, and the steps are straightforward. Start with a small batch to build confidence, then scale up.
Q: Can I bake this in a loaf pan instead of on a sheet?
A: Yes. If using a loaf pan, reduce the rise time slightly and bake until the center reaches about 190–200°F (88–93°C) for a fully set crumb.
10. Conclusion
This Easy Hobbiton herb bread recipe brings a little wizardry to your kitchen with every slice. The aroma, the crust, and the herb-forward bite invite you to linger at the table and share stories. It’s a comforting, crowd-pleasing bread that fits perfectly into a Lord of the Rings themed meal or a cozy weeknight dinner. Enjoy the magic, bake with heart, and savor each warm, fragrant bite.
Print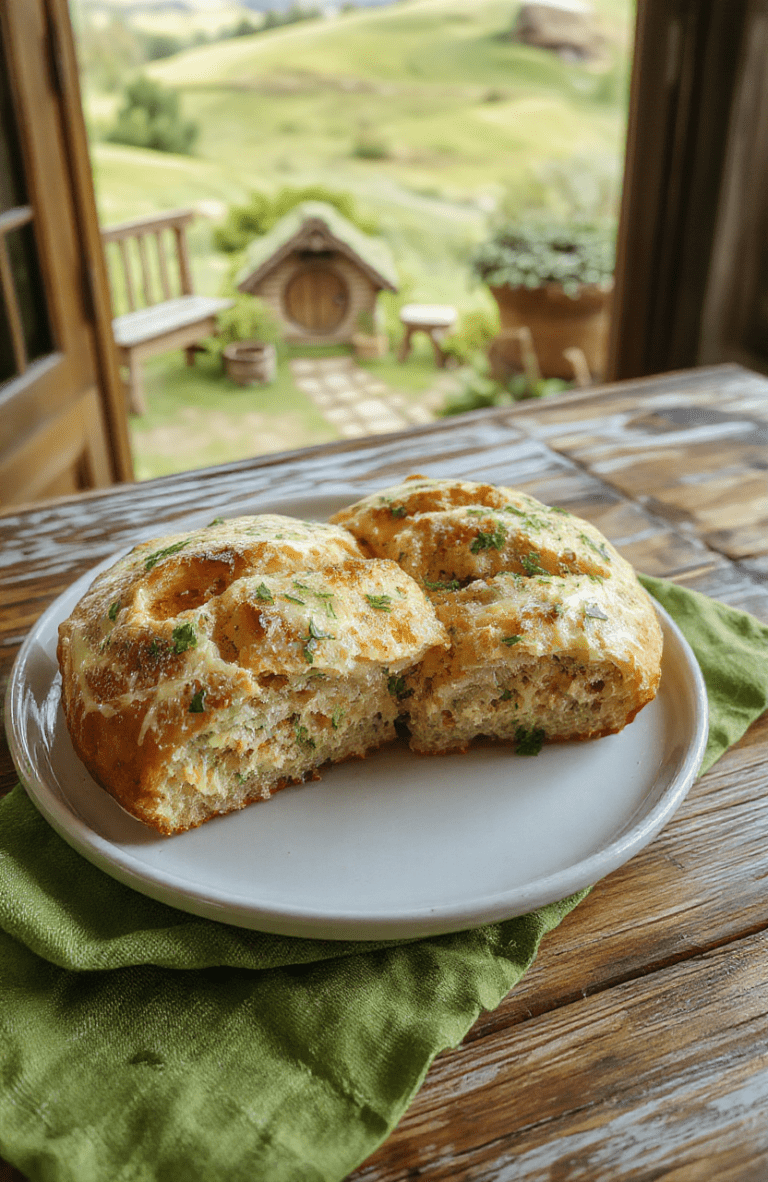
Easy Lord of the Rings Hobbiton Herb Bread Recipe 🌿🍞
This simple, herb-forward loaf captures the rustic charm of Hobbiton. A crusty, soft-crumb bread studded with rosemary, thyme and chives, perfect for dipping and buttering.
- Total Time: 40 mins
- Yield: 1 loaf (12 slices)
Ingredients
- 3 cups all-purpose flour
- 1 tablespoon sugar
- 2 teaspoons instant yeast
- 1 teaspoon salt
- 1 cup warm water
- 2 tablespoons olive oil
- 2 tablespoons chopped fresh herbs (rosemary, thyme, chives)
- Optional: 1 tablespoon butter for brushing
Instructions
- In a large bowl, whisk flour, sugar, yeast, and salt.
- Stir in warm water and olive oil until a shaggy dough forms.
- Knead 6-8 minutes until smooth and elastic, adding a bit more flour if sticky.
- Place dough in a greased bowl, cover, and let rise 20-30 minutes until puffy.
- Shape into a round loaf and place on a parchment-lined baking sheet.
- Bake at 425°F (220°C) for 20-25 minutes until golden and hollow-sounding.
- Brush with melted butter while warm and let rest 10 minutes before slicing.
Notes
- Brush with melted butter for a softer crust.
- For extra aroma, add minced garlic or chopped sun-dried tomatoes.
- Slice after cooling for clean serving.
- Store leftovers wrapped in a cloth for 2-3 days.
- Prep Time: 15 mins
- Cook Time: 25 mins
- Method: Baking
- Cuisine: Fantasy/Hobbiton
- Diet: Vegetarian
Nutrition
- Serving Size: 1 slice
- Calories: 95 kcal
- Sugar: 1 g
- Sodium: 180 mg
- Fat: 3 g
- Saturated Fat: 0.5 g
- Unsaturated Fat: 2.5 g
- Trans Fat: 0 g
- Carbohydrates: 16 g
- Fiber: 1 g
- Protein: 3 g
- Cholesterol: 0 mg
